
Table of Contents
- Why Sealing Rodent Entry Points Matters
- Method 1: Steel Wool and Caulk for Small Gaps
- Method 2: Metal Mesh and Hardware Cloth for Larger Openings
- Method 3: How to Seal Mouse Entry Points with Metal Flashing
- Best Materials to Seal Rodent Holes and Irregular Gaps
- Installing a Rodent-Proof Door Sweep for Foundation Entry
- Signs of Rodent Damage in Walls and How to Prevent Further Entry
- Inspection, Preparation, and Verification
- Frequently Asked Questions
Last Updated: October 8, 2026
Why Sealing Rodent Entry Points Matters
Rodents don’t need much space to get inside your home, which is why you need to seal rodent entry points. A mouse can squeeze through a gap the size of a dime.
The real problem isn’t just the mess they make during an infestation. It’s preventing the next one. Pest control eliminates the current problem. Sealing rodent entry points stops new ones from getting in.
This guide covers five proven methods to seal rodent entry points, from small gaps around doors and windows to larger openings around pipes and foundation cracks.
The biggest mistake homeowners make is sealing gaps without first checking for active rodents inside. If you trap rodents inside sealed walls, they’ll die and create odor problems. Always confirm the infestation is cleared before you seal.
Method 1: Steel Wool and Caulk for Small Gaps
Steel wool is the most popular choice for sealing rodent entry points around small openings. Rodents can’t chew through steel. It’s cheap, effective, and works on gaps up to one-half inch wide.
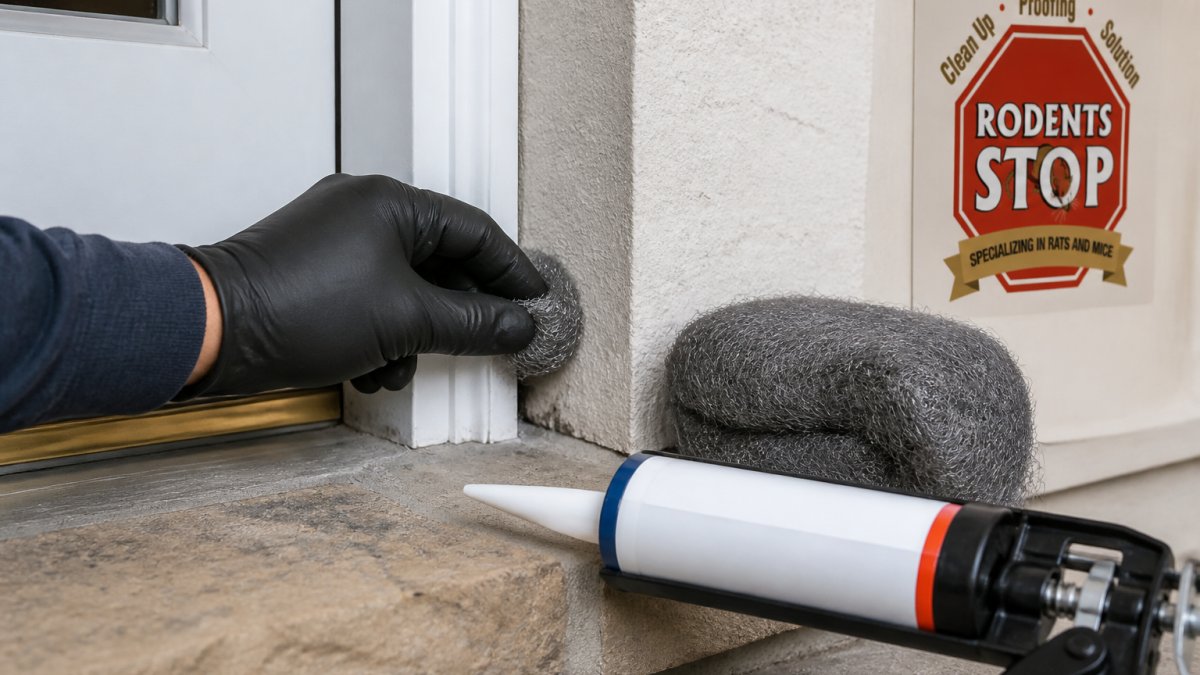
The process is straightforward. Stuff steel wool into the gap, then seal it with caulk. The caulk holds the steel wool in place and prevents air from flowing around it.
Installation and Safety Considerations
Wear gloves when handling steel wool. The fibers are sharp and can irritate skin. Work in a well-ventilated area, especially if you’re using spray foam afterward.
Here’s the step-by-step process:
- Clean the gap first with a brush or compressed air to remove dust and debris
- Pack steel wool firmly into the opening using a screwdriver or putty knife
- Apply silicone caulk over the steel wool with a caulking gun
- Smooth the caulk with a wet finger or caulk tool
- Let it cure for 24 hours before exposing it to water or weather
This method works best on gaps around door frames, window frames, and small openings near pipes. It’s less effective on large irregular gaps or areas with movement, like gaps around settling foundations.
Do NOT use spray foam alone without steel wool backing. Rodents can chew through expanding foam. Always combine foam with a metal barrier for maximum protection.
Method 2: Metal Mesh and Hardware Cloth for Larger Openings
Hardware cloth is a metal mesh made from galvanized or stainless steel wire. It’s stronger than steel wool and works on openings up to two inches wide. It’s also more durable outdoors and won’t compress over time like foam does.
Hardware cloth comes in rolls and sheets. You cut it to size, fit it into the opening, and secure it with caulk or fasteners. For larger holes, use hardware cloth as the primary barrier. For gaps around pipes or foundation cracks, fold it to fit the space and seal the edges with caulk.
Choosing the Right Mesh Size
The mesh size matters. Rodents can squeeze through larger holes, so use hardware cloth with openings no larger than one-quarter inch. Smaller mesh (one-eighth inch) offers better protection but costs more and is harder to work with.
For most applications, one-quarter inch hardware cloth is the best balance:
- Small gaps and cracks: one-eighth inch mesh (maximum protection)
- Vents and larger openings: one-quarter inch mesh (standard choice)
- Foundation cracks: one-quarter inch mesh (easier to install than smaller sizes)
Galvanized hardware cloth costs less but rusts over time. Stainless steel costs more but lasts decades without degrading. For permanent installations, stainless steel is worth the extra expense.
Installation steps for hardware cloth:
- Measure the opening and cut the mesh slightly larger than needed
- Fit the mesh into the gap, folding edges as needed to fill irregular spaces
- Secure with galvanized staples or screws every two inches
- Seal gaps around the mesh edges with silicone caulk
- Check for sharp edges and file them smooth to prevent injury
Method 3: How to Seal Mouse Entry Points with Metal Flashing
Metal flashing is a thin sheet of aluminum or galvanized steel used in roofing and construction. It’s excellent for sealing rodent entry points on foundation walls, siding, and around roof penetrations. Flashing is rigid, durable, and resists chewing better than most materials.
Flashing works best on larger areas where you need a solid barrier. It’s more expensive than steel wool or hardware cloth but lasts much longer and provides a complete seal that rodents can’t bypass.
Installation Around Vulnerable Areas
Foundation walls are a common entry point for rodents. Flashing creates a barrier that extends both above and below the soil line, blocking access completely.
To install flashing around foundation openings:
- Clean the area and remove loose mortar or siding
- Cut flashing to size, overlapping edges by at least two inches
- Secure flashing with galvanized fasteners spaced four inches apart
- Seal all seams and fastener holes with silicone caulk
- Cover fastener heads with caulk to prevent water penetration
Flashing around pipes requires a different approach. Use flashing collars designed for the pipe diameter. Slide the collar over the pipe, press it against the wall, and seal around the edges with caulk.
Roof penetrations are another common entry point. Install flashing around the vent pipe or chimney, overlapping the roofing material. Seal all edges with roofing cement or silicone caulk rated for roof use.
Metal flashing is the most durable option for sealing rodent entry points on large openings and foundation walls. It’s worth the extra cost if the gap is bigger than one inch or in a high-traffic area where rodents frequently enter.
Best Materials to Seal Rodent Holes and Irregular Gaps
Not all gaps are the same size or shape. Some are small and round. Others are large, irregular, or in hard-to-reach places. Choosing the right material for the specific gap makes the difference between a seal that lasts and one that fails in a few months.
Comparing Durability and Chew-Resistance
Here’s how the main sealing materials compare:
| Material | Best For | Durability | Chew-Resistant | Cost |
|---|---|---|---|---|
| Steel wool + caulk | Small gaps under 0.5″ | 3-5 years | Excellent | Low |
| Hardware cloth | Openings 0.5-2″ | 5-10 years | Excellent | Medium |
| Metal flashing | Large openings, foundations | 10+ years | Excellent | High |
| Exterior sealant foam | Large irregular gaps | 2-4 years | Poor alone | Low |
| Copper mesh | Small gaps, premium | 15+ years | Excellent | High |
Exterior sealant foam expands to fill gaps but degrades in sunlight. Never use it alone. Always back it with hardware cloth or steel wool for rodent protection.
Copper mesh is a premium option. It’s more expensive than steel wool but lasts longer and resists corrosion better. Use it in damp areas like crawl spaces or around foundation cracks where moisture is constant.
The key is matching the material to the location:
- Gaps under half an inch: steel wool and caulk
- Gaps half an inch to two inches: hardware cloth and caulk
- Large irregular gaps: hardware cloth or flashing plus foam
- Damp areas: copper mesh or stainless steel mesh
- Permanent installations: flashing or copper mesh
Installing a Rodent-Proof Door Sweep for Foundation Entry
Doors are a major entry point for rodents. A gap under a door is an open invitation.
A rodent-proof door sweep is different from a standard door sweep. It has a tighter seal and is made from durable materials that resist chewing.
Installation is simple:
- Measure the door width
- Buy a door sweep rated for rodent exclusion (look for metal or reinforced rubber)
- Remove the backing and press the sweep firmly onto the bottom of the door
- Test the fit by closing the door and checking for gaps
- If the door sags or doesn’t close smoothly, adjust the sweep position
For doors that don’t close evenly, add a door threshold. A threshold is a raised strip at the bottom of the door frame that the door closes against.
Some doors have large gaps because the frame has settled. In these cases, install both a threshold and a door sweep for maximum protection.
Signs of Rodent Damage in Walls and How to Prevent Further Entry
Rodents leave visible signs of damage that help you identify where they’ve been. Look for gnaw marks on wood, insulation, or drywall. Check for droppings, which are dark and rice-shaped. Listen for scratching sounds in walls, especially at night.
Once you spot damage, you know rodents are using that area. But finding the entry point isn’t always obvious. Rodents can travel through walls and enter from multiple locations.
Found gnaw marks on a cable? Read Can Rats or Mice Chewing Wires Cause a House Fire? for guidance on electrical repairs and a rodent assessment.
Identifying Active Infestation Before Sealing
Before sealing any gaps, confirm the infestation is cleared. If rodents are still inside, sealing them in will trap them and create serious odor problems as they die in inaccessible spaces.
Signs of active infestation:
- Fresh droppings (dark, moist, clustered in one area)
- Gnaw marks on food packages or wiring
- Scratching or squeaking sounds at night
- Ammonia smell in attics or crawl spaces
- Grease marks along walls where rodents travel
If you see these signs, contact a pest control professional first. Let them eliminate the infestation. Then seal the entry points to prevent reinfestation. Rodent infestation cleanup can help identify entry points during the cleanup process, with teams that inspect attics, crawl spaces, foundations, and exterior walls to find where rodents got in and recommend the best sealing method for each opening.
Inspection, Preparation, and Verification
Successful sealing starts with a thorough inspection. Walk the entire exterior of your home and look for gaps. Pay special attention to areas where utilities enter the building: water lines, gas lines, electrical conduits, and HVAC ducts.
Check these common entry points:
- Gaps around door and window frames
- Openings where pipes or wires enter the house
- Cracks in foundation walls or concrete slabs
- Gaps in siding or trim
- Openings around roof penetrations like vents or chimneys
- Gaps under eaves or fascia boards
Mark each opening with chalk or tape. Measure the size so you know which sealing material to use. Take photos for reference.
Common Mistakes to Avoid
The biggest mistake is sealing gaps without first removing rodents from inside. Another common error is using the wrong material for the gap size.
Other mistakes to avoid:
- Sealing gaps with caulk alone (rodents chew through it)
- Using standard spray foam without a metal backing
- Leaving gaps around fasteners or seams
- Failing to seal both sides of a gap
- Applying sealant to dirty or wet surfaces
- Not letting caulk cure fully before exposing it to weather
Preparation matters. Clean the gap before sealing. Remove loose debris, old caulk, and dirt. Let the surface dry completely.
After sealing, verify your work. Walk the exterior again and look for any gaps you missed. Check seals around pipes and utilities.
The goal is a complete barrier. One missed gap defeats the entire effort. Take your time and be thorough.
Sealing rodent entry points is the most effective way to prevent future infestations.
After cleanup, a thorough inspection of your home can find where rodents got in, and guidance through the sealing process helps prevent it from happening again.
Frequently Asked Questions
Should you seal rodent entry points before or after removing rodents?
Seal entry points after pest control has eliminated the active infestation. If rodents are still present, sealing gaps can trap them inside and create worse damage. Work with a pest control professional to confirm the infestation is gone, then seal all entry points to prevent re-entry. This two-step approach ensures rodents cannot return to your home.
How small of a gap can a mouse squeeze through?
Mice can fit through openings as small as one-quarter inch (6 mm). Rats need slightly larger gaps, typically one-half inch or more. When sealing rodent entry points, target any opening larger than one-quarter inch with steel wool, metal mesh, or caulk. Don’t assume a gap is too small, rodents are surprisingly flexible and can compress their bodies to access surprisingly tight spaces.
What materials can rodents chew through?
Rodents can chew through plastic, rubber, wood, drywall, and standard foam sealants. Steel wool, galvanized wire mesh, stainless steel mesh, and metal flashing resist rodent chewing. When choosing materials to seal rodent holes, prioritize chew-resistant options. Combining steel wool with caulk or using hardware cloth creates a stronger barrier than either material alone, making it harder for rodents to breach the seal.
How do you seal gaps around pipes and utility lines?
Identify all pipes, wiring, and utility lines entering your home. Wrap steel wool around the gap, then apply caulk or exterior sealant over it. For larger gaps around plumbing or HVAC lines, use metal mesh or hardware cloth secured with caulk. Ensure the seal is tight but doesn’t restrict pipe movement or damage insulation. Check seasonal gaps where pipes may expand and contract, and plan for maintenance or re-sealing if gaps reopen.