Table of Contents
- Why Identifying Rodent Entry Points Matters
- Common Mouse Entry Points in Homes
- Signs of Rodent Damage in Walls and Structures
- Step-by-Step Inspection Process
- How to Seal Rodent Entry Points Effectively
- Seasonal Inspection Checklist
- When to Call a Professional
- Conclusion
Last Updated: August 28, 2026
Why Identifying Rodent Entry Points Matters
Finding where rodents enter is the single most important step in preventing infestations. Most homeowners focus only on trapping visible rodents, then wonder why new ones appear weeks later. The real problem isn’t the rodents already inside, it’s the open door they used to get there.
At Rodent Cleanup Experts, we’ve inspected thousands of homes across Southern California and found that nearly every infestation traces back to unsealed entry points. Mice squeeze through openings as small as a dime (the CDC). Rats need only a hole the size of a quarter (the CDC). These gaps hide in foundation cracks behind landscaping, gaps around utility pipes, worn weatherstripping on garage doors, and spaces where the attic meets exterior walls.
Identifying entry points early stops infestations before they start. Once rodents nest in walls, attics, or crawl spaces, damage compounds quickly. They contaminate insulation with droppings and urine, gnaw through electrical wiring and HVAC components, and leave odors that persist for months. Prevention costs a fraction of professional remediation.
This guide walks you through a systematic inspection process to locate rodent entry points, recognize damage they leave behind, and understand which materials seal different openings effectively.
Common Mouse Entry Points in Homes
Rodents follow predictable pathways into homes, searching for the easiest route to shelter, food, and nesting materials.
Foundation Cracks and Gaps
The foundation is the most common entry point. Concrete cracks naturally over time due to settling, temperature changes, and freeze-thaw cycles. A hairline crack may be wide enough for a mouse to slip through.
Inspect the entire foundation perimeter, paying special attention to where the foundation meets the soil. Look for horizontal or vertical cracks and gaps where the foundation has separated from the sill plate. Rodents follow the soil line and exploit any opening there. Check both exterior and interior (basement or crawl space) sides. Cracks wider than one-eighth inch admit mice; rats enter through cracks one-quarter inch or larger.
Foundation settling creates gaps around corners or where materials transition. Vegetation and mulch piled against the foundation hide openings and provide rodent cover.
Utility Penetrations and Pipe Openings
Every pipe, cable, and utility line penetrating exterior walls creates a potential entry point. Water lines, gas lines, electrical conduits, and HVAC ducts all penetrate foundations or walls. Contractors typically drill holes larger than necessary, leaving gaps around penetrations.
Common problem areas include water meter connections, dryer vents, refrigerant lines, cable entry points, sewer vents, and downspouts near the foundation. Rodents chew away deteriorated caulk or foam sealant. A gap of just a few millimeters around a pipe is sufficient for a mouse to enter.
Doors, Windows, and Garage Seals
Entry points at doors and windows are often overlooked. Weatherstripping wears out, door sweeps crack, and garage seals deteriorate. Rodents squeeze under a door if the gap exceeds one-quarter inch.
Check gaps under exterior doors, worn weatherstripping, damaged door sweeps, gaps around window frames, garage door seals, and gaps where the garage door frame meets the wall. Garage doors are particularly vulnerable, the rubber seal wears quickly, and side gaps develop where the frame meets the wall. Rodents frequently use garage entry points because garages offer easy access to food, vehicles, and pathways into the main house.
Signs of Rodent Damage in Walls and Structures
Before sealing entry points, determine if rodents are already inside. Identifying signs of activity tells you whether you’re dealing with an active infestation and how severe the damage is.
Gnaw Marks and Chew Damage
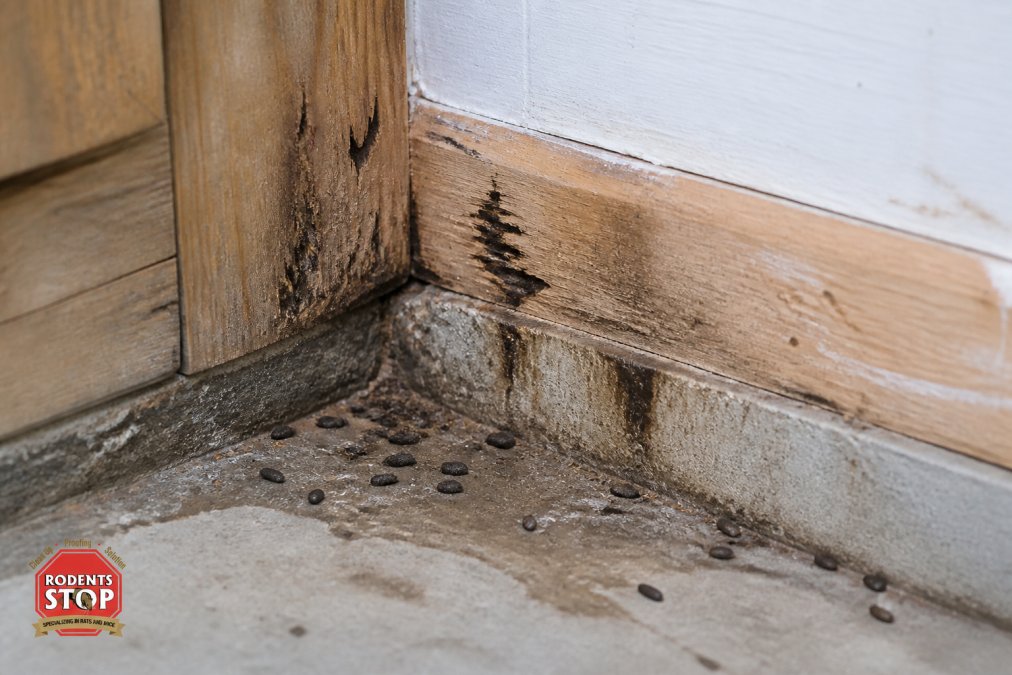
Rodents gnaw constantly because their teeth never stop growing. Fresh gnaw marks are lighter in color with sharp edges; old gnaw marks darken as dust settles into them.
Look for gnaw damage on wooden beams, insulation, drywall, electrical wiring, cardboard boxes, and door frames. Mouse gnaw marks are small and precise, appearing as parallel scratches. Rat gnaw marks are larger and more destructive, with visible chunks removed. Multiple gnaw marks in one area indicate rodents actively use that space as a pathway or nesting zone.
Grease Marks and Rub Marks
Rodents leave greasy stains along regular travel routes where their fur repeatedly contacts surfaces. These rub marks appear as dark smudges along baseboards, wall corners, pipes, and beams, particularly visible on light-colored surfaces around holes or cracks.
Rub marks indicate established rodent runways. Rodents have poor eyesight and rely on touch and smell to navigate, following the same paths repeatedly. Fresh rub marks are darker and more pronounced; older marks fade as grease oxidizes. Check corners, baseboards, pipes, and entry points. Grease marks on the exterior, particularly around foundation cracks or utility penetrations, confirm rodents actively use those specific entry points.
Droppings, Urine Stains, and Odors
Rodent droppings are the most obvious infestation sign. Mouse droppings are small, dark, and rice-shaped, typically one-quarter inch long (the CDC). Rat droppings are larger, one-half to three-quarters inch long, and capsule-shaped. Fresh droppings are moist and dark; old droppings are dry and gray.
Rodent urine creates stains and strong ammonia-like odors, becoming more noticeable in enclosed spaces like attics and crawl spaces. Look for droppings and urine stains in attics, crawl spaces, behind appliances, inside wall cavities, along baseboards, near food storage, and inside stored boxes. Droppings clustered in one area suggest a nesting site; scattered droppings indicate active foraging throughout multiple areas.
Step-by-Step Inspection Process
A systematic inspection ensures you don’t miss critical entry points. This process takes two to four hours depending on home size and accessibility. Inspect during daylight with natural light, checking both exterior perimeter and interior spaces.
Step 1: Gather Your Inspection Tools
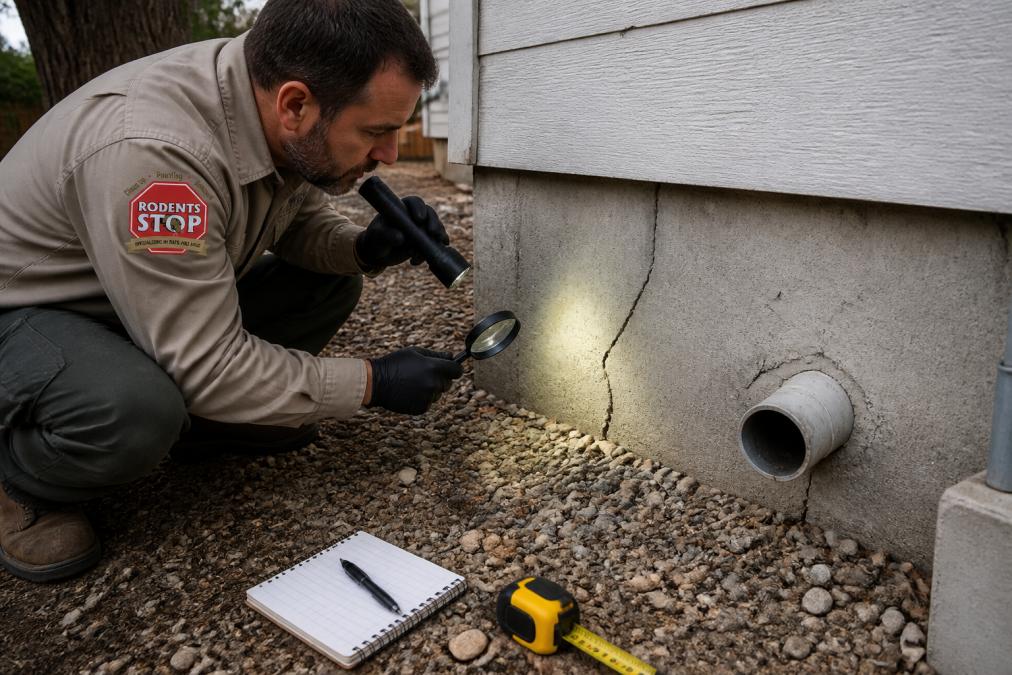
Assemble these items before starting:
- Flashlight or headlamp
- Magnifying glass
- Measuring tape
- Notebook or phone
- Ladder
- Screwdriver or small pry bar
- Work gloves and dust mask
- Camera or smartphone
Optional tools include a thermal camera to detect air leaks and a UV light to identify urine stains.
Step 2: Inspect the Foundation and Exterior
Start at ground level and work systematically around the entire exterior perimeter. Begin at one corner and move around the foundation, looking for cracks, gaps where the foundation meets the sill plate, and areas of settling or separation. Pay special attention to soil or mulch piled against the foundation.
Check all utility penetrations, tracing water lines, gas lines, electrical conduits, and HVAC ducts. Look for gaps or deteriorated caulk around penetrations. Mark any openings larger than one-eighth inch.
Inspect all exterior doors and windows for gaps under doors, worn weatherstripping, and damaged door sweeps. Examine the garage door seal and gaps around the garage door frame. Check the roof line, soffit areas, dryer vents, bathroom exhaust vents, and roof penetrations.
Step 3: Check Attics, Crawl Spaces, and Upper Areas
Access your attic and crawl space if possible. Wear a dust mask and gloves, rodent droppings harbor bacteria and allergens.
In the attic, look for gnaw marks on beams, droppings concentrated in corners, disturbed insulation, and gaps where the attic meets exterior walls. Check where pipes and ducts penetrate the ceiling.
In the crawl space, check for droppings, nesting materials, and damaged insulation. Look at pipes and ducts for gnaw damage. Inspect the rim joist (the band of wood on top of the foundation) for cracks and gaps, a frequent entry point.
Step 4: Examine Interior Walls and Utility Areas
Check inside cabinets under sinks where pipes penetrate walls. Inspect areas around water heaters, furnaces, and HVAC units. Check closets along exterior walls and basements. Document all findings with photographs, measurements, and notes.
How to Seal Rodent Entry Points Effectively
Once you’ve identified entry points, seal them with materials rodents cannot chew through or squeeze around.
DIY vs. Professional Exclusion Materials
Steel wool and caulk work for small gaps up to one-quarter inch. Stuff steel wool into the opening, then caulk around it. Rodents cannot chew through steel wool, but caulk alone is not rodent-proof.
Copper mesh is more durable than steel wool for slightly larger gaps. It’s flexible enough to fill irregular shapes but rigid enough to resist chewing.
Hardware cloth (galvanized steel mesh with one-quarter inch or smaller openings) is the gold standard for larger gaps. It’s rigid, rodent-proof, and can be cut to size and secured with screws or staples.
Expanding foam sealant fills irregular gaps but rodents can chew through it. Always cover foam with hardware cloth or metal flashing.
Metal flashing seals gaps around pipes, vents, and utility lines. It’s permanent and rodent-proof but requires proper installation.
Weatherstripping and door sweeps seal gaps under doors and around windows. Silicone-based weatherstripping is more durable than foam.
Professional exclusion materials include one-way door systems and specialized sealants designed to harden to a consistency rodents cannot chew.
Sealing Small Gaps and Cracks
For small cracks in concrete or mortar:
- Clean out loose debris with a wire brush
- Stuff steel wool into the crack
- Apply caulk over the steel wool, smoothing it flush
- Allow caulk to cure per manufacturer instructions
For gaps around pipes:
- Remove old caulk or foam
- Stuff steel wool around the pipe
- Apply caulk or foam sealant over the steel wool
- Trim excess foam once hardened
Inspect sealed gaps periodically. Caulk can crack or shrink over time, especially in areas exposed to temperature changes.
Protecting Vents and Larger Openings
Vents, weep vents, and larger gaps require stronger materials while maintaining necessary ventilation and drainage.
Vent screens installed over foundation vents, attic vents, and soffit vents should use hardware cloth or vent screen with openings no larger than one-quarter inch. Secure with screws or rivets so rodents cannot pry them loose.
Weep vents (small openings in brick or stone for moisture drainage) require removable or hinged screens that allow water drainage while blocking rodents.
Dryer vents and exhaust ducts should have one-way dampers that close when not in use. Rigid metal duct is preferable to flexible plastic, which rodents chew through.
Garage door gaps can be sealed with new seals or weather stripping on the sides. Large gaps require threshold seals or metal strips at the base.
Rim joist gaps are sealed using hardware cloth and caulk. Cut hardware cloth to size, secure with screws spaced 6 inches apart, then caulk around edges.
Professional sealing often combines materials in layers. For example, a large gap might be filled with foam, covered with hardware cloth, and sealed with caulk.
Seasonal Inspection Checklist
Rodent activity and entry point vulnerability change with seasons.
Spring (March-May):
- Inspect the foundation for cracks from freeze-thaw cycles
- Check weatherstripping and door seals for winter wear
- Clear debris and vegetation from around the foundation
- Inspect attic and soffit vents for damage
- Look for signs of winter rodent activity
Summer (June-August):
- Check for new cracks from house settling in warm weather
- Inspect sealed entry points from last year
- Look for rodent activity near food storage and trash
- Check vent screens for damage or blockage
- Inspect utility penetrations for enlarged gaps
Fall (September-November):
- Seal entry points before rodents move indoors for winter
- Clear gutters and drainage areas
- Check weatherstripping and door seals before cold weather
- Inspect the foundation for new cracks
- Trim tree branches and vegetation away from roof and walls
Winter (December-February):
- Monitor for signs of rodent activity
- Check sealed entry points for deterioration
- Inspect areas where heating systems may have created gaps
- Look for evidence of rodents in attics, crawl spaces, and walls
When to Call a Professional
Some entry points and damage require professional expertise. Rodent Cleanup Experts can assess your home, identify all entry points, and recommend a sealing strategy tailored to your property.
Call a professional if:
- You discover an active infestation with widespread gnaw marks, droppings, or nesting materials
- Entry points are located on the roof or in difficult-to-access areas
- Damage extends into walls, HVAC systems, or electrical wiring
- You’ve sealed entry points but rodents continue to enter
- You need guidance on which materials and methods work best for your situation
- Insulation, wiring, or structural components have been contaminated or damaged
Professional inspections reveal entry points homeowners miss. Rodent Cleanup Experts uses systematic inspection methods and specialized tools to identify vulnerabilities and seal entry points correctly the first time.
If rodents have already nested in your home, professional rodent infestation cleanup is essential. Attempting to clean contaminated areas yourself exposes you to bacteria, viruses, and allergens in rodent droppings and urine. Professional teams use HEPA filtration, proper containment, and safe disposal methods to restore contaminated areas.
Identifying rodent entry points is the foundation of effective pest prevention. A thorough inspection saves you from the much larger expense of dealing with an active infestation. Once you’ve located entry points, sealing them with appropriate materials stops rodents from entering. For complex situations, widespread infestations, or contaminated areas requiring deep cleaning, Rodent Cleanup Experts provides comprehensive assessment and professional remediation services throughout Southern California. Our team helps you clean up what rodents left behind and identifies and seals the entry points that allowed them inside, reducing the risk of rodents returning.
Frequently Asked Questions
How small of a hole can a mouse fit through?
A mouse can squeeze through a hole as small as one-quarter inch (about the size of a dime). Rats need slightly larger openings, typically one-half inch or larger. When sealing rodent entry points, check for gaps smaller than this, they're still vulnerable. Use steel wool, copper mesh, or caulk to close these tiny openings, as rodents cannot chew through these materials effectively.
What are the most common signs of rodent entry points?
Look for gnaw marks on wood, drywall, or insulation around potential entry areas. Grease marks and rub marks appear where rodents frequently brush against surfaces. Droppings, urine stains, and strong odors indicate active or recent activity. Foundation cracks, gaps around pipes, and unsealed vents are physical entry points. Insulation tunnels and burrows in attic spaces also signal where rodents are traveling inside your home.
How do I know if a rodent entry point is currently active?
Fresh droppings, wet urine stains, and strong odors suggest active infestation. Look for new gnaw marks without dust buildup, these indicate recent chewing. Rodent runways show worn paths through insulation or along walls from repeated travel. Nocturnal activity signs include sounds in walls at night and fresh nesting materials. If you spot multiple indicators together, rodents are likely using that entry point now and need immediate attention.
What materials are best for sealing rodent entry points?
Steel wool and copper mesh are excellent because rodents cannot chew through them. Caulk works well for small cracks and gaps, though it should be paired with steel wool for larger openings. Weather stripping seals gaps under doors and around windows. Door sweeps prevent entry at ground level. For vents, use hardware cloth or vent screens. Avoid foam sealant alone, rodents can chew through it. Combine materials for stronger protection against rodent exclusion.
This article was written using GrandRanker