
Table of Contents
- Why Rodent Waste Is More Dangerous Than It Looks
- How to Clean Up Rodent Droppings Safely
- Rodent Waste Cleanup Protective Equipment: What You Actually Need
- Rodent Urine Cleanup and Disinfection: Choosing the Right Product
- How to Remove Rat Smell After an Infestation
- When to Call a Professional for Rodent Waste Decontamination
- Common Mistakes That Make Rodent Waste Decontamination Fail
- Preventing Future Infestations After Cleanup
- Frequently Asked Questions
Last Updated: October 13, 2026
Why Rodent Waste Is More Dangerous Than It Looks
Rodent waste decontamination means safely removing droppings, urine, nesting material, and contaminated dust, then disinfecting every surface the rodents touched.
When rodent waste dries, it releases fine particles into the air. Sweeping or vacuuming those particles sends them straight into your lungs.
Rodents carry bacteria, viruses, and parasites that spread through their waste. Common concerns include:
- Hantavirus, linked to dried urine and droppings
- Salmonella, spread through contaminated surfaces and food
- Leptospirosis, passed through urine in water or soil
At Rodent cleanup experts, we see attics and crawl spaces where contamination runs far past the visible mess.
How to Clean Up Rodent Droppings Safely
Safe cleanup follows one rule: never let the waste go airborne. These steps apply whether you find a few droppings in a kitchen drawer or a full attic infestation.
Step 1: Ventilate and Isolate the Area
Open windows and doors before you touch anything and air the space out for at least 30 minutes. Keep pets and children out, and seal the room from the rest of the home with plastic sheeting or a closed door.
Step 2: Dampen, Do Not Sweep
Spray droppings, nesting material, and surrounding surfaces with disinfectant or bleach solution until visibly wet. Never sweep or use a standard vacuum first, dry sweeping kicks dried urine and droppings into the air. Once dampened, wipe up with paper towels or disposable rags and double-bag everything.
Step 3: Bag and Dispose of Contaminated Materials
Place all waste, gloves, and used rags into a sealed plastic bag, then inside a second sealed bag. In most areas, double-bagged rodent waste can go out with regular trash. After removal, disinfect the area again, wipe down hard surfaces, and wash your hands for at least 20 seconds.
Rodent Waste Cleanup Protective Equipment: What You Actually Need
The right protective equipment is the difference between a safe cleanup and a hospital visit.
For light contamination, a basic kit works:
- Disposable nitrile gloves
- N95 respirator
- Safety goggles
For heavy infestations, especially in attics or crawl spaces, upgrade to a P100 half-face respirator, add hooded coveralls, and tape the seams at your wrists and ankles so dust cannot creep in.
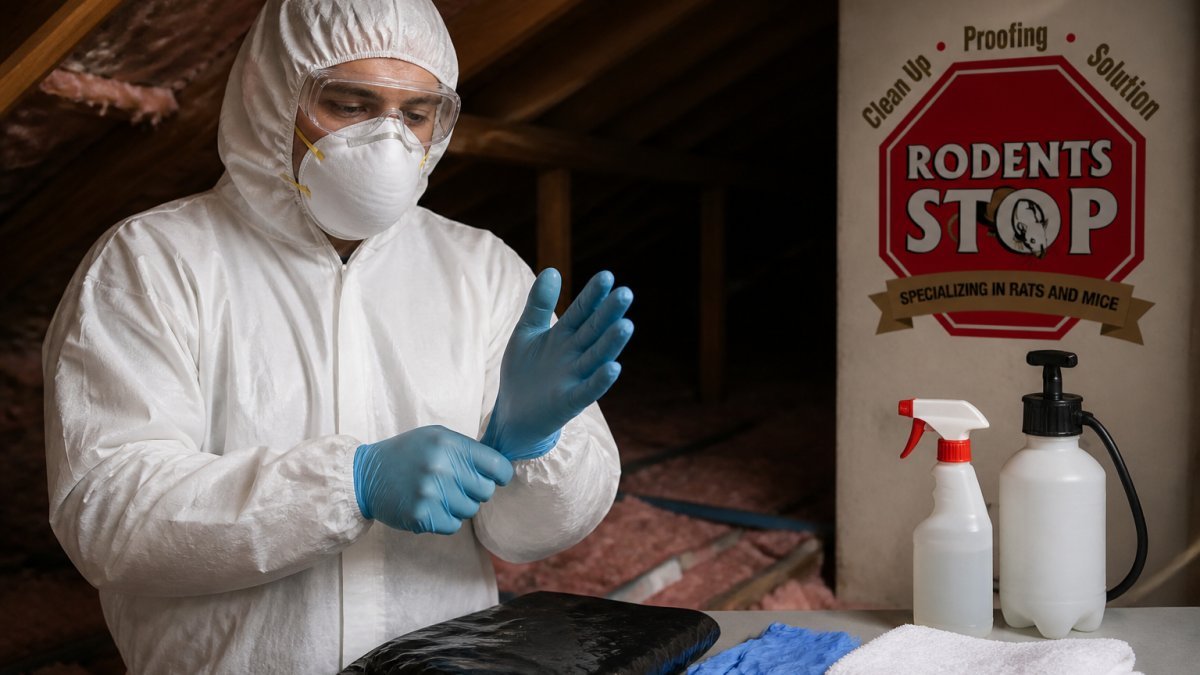
Never reuse gloves or a respirator filter after rodent cleanup. Contaminated gear carries the same germs as the waste itself. Bag it with the rest of the debris and throw it away.
Wash with soap and water immediately after removing your gear, even if you wore gloves the whole time.
Rodent Urine Cleanup and Disinfection: Choosing the Right Product
Disinfection is the step most DIY cleanups get wrong: “kills germs” on a label does not mean it kills the pathogens in rodent waste. The product must suit the organism, be applied at the right concentration, and stay wet long enough to work.
Pre-clean first. Organic matter, urine residue, droppings, dust, neutralizes many disinfectants on contact. Wipe or scrub visible contamination away with soap and water, then apply disinfectant to a clean surface.
Disinfectant Options and What Each One Is Actually Good For
| Product | Typical Wet Contact Time | Works On | Watch Out For |
|---|---|---|---|
| Diluted household bleach | About 10 minutes | Hard, non-porous surfaces: tile, sealed countertops, metal fixtures | Corrodes metal with repeated use; bleaches fabric; loses strength as it sits, so mix fresh |
| Quaternary ammonium disinfectants | Label-specific, often around 10 minutes | Floors, walls, most hard surfaces | Some leave a residue that must be rinsed before food-contact surfaces |
| Phenolic disinfectants | Label-specific | Hard surfaces, some porous materials | Can be harsh on skin and some plastics; not for food-contact surfaces |
| Accelerated hydrogen peroxide | Label-specific, often 1-5 minutes | Broad range, including some porous surfaces | Fewer material-compatibility problems than bleach |
| Enzymatic cleaner | 10-30 minutes | Urine odor on fabric, carpet, and hard surfaces | Breaks down odor proteins; not a substitute for a disinfectant step |
Two rules govern all of them:
- Follow the label, not a general rule of thumb. Contact times vary by product and by the organism the label claims to kill. If the label says five minutes for the pathogen you care about, five minutes is the number, not ten, not one.
- Keep the surface visibly wet for the full contact time. If it dries early, reapply and restart the clock. A quick spray-and-wipe does not disinfect; it just wets the surface.
Bleach Solution: Mixing and Limits
Diluted household bleach is the standard choice for hard, non-porous surfaces contaminated by rodents. Mix it fresh each time, bleach loses potency as it sits. Never mix bleach with ammonia or other cleaners; the reaction produces dangerous fumes.
Bleach has limits: it corrodes metal, destroys fabric and finishes, and does not penetrate porous materials. On wood framing, insulation, or drywall, it treats only the surface and leaves whatever soaked in below untouched.
Material Compatibility: What You Can Disinfect and What You Cannot
Ask one question: can the disinfectant reach the contamination?
- Non-porous surfaces, sealed countertops, tile, metal, glass, painted trim, can be cleaned and disinfected reliably. Clean, apply, keep wet for the label contact time, then wipe.
- Semi-porous surfaces, unfinished wood, concrete, grout, absorb liquid and hold contamination below the surface. Disinfection helps but may not fully resolve it; sealing afterward is often necessary.
- Porous materials, insulation, carpet, upholstered furniture, cardboard, paper food packaging, cannot be reliably disinfected. Urine and dust penetrate the material, and no surface spray reaches it. Replacement is the safer choice, and for insulation and food packaging it is usually the only correct one.
A Practical Order of Operations
- Ventilate the space and put on the protective equipment described above.
- Dampen waste and surfaces with disinfectant before any removal.
- Remove waste, nesting material, and any porous items you are discarding. Double-bag them.
- Pre-clean remaining hard surfaces with soap and water.
- Apply the disinfectant and hold the surface wet for the full label contact time.
- Let surfaces air-dry, then repeat disinfection on high-touch areas.
- Treat lingering urine odor with an enzymatic cleaner after disinfection, not instead of it.
If you are unsure whether a product is appropriate for the surface or the organism, check the label’s kill claims and its material-compatibility statement. When in doubt on a porous item, replace it rather than trying to clean it.
How to Remove Rat Smell After an Infestation
Odor is the last symptom to clear and the best signal that something was missed. Rat smell comes from bacteria breaking down waste and from pheromones in urine that persist long after the bacteria are gone, telling you contamination remains somewhere you have not reached.
Why Odor Returns
If the smell fades and returns, the source was masked, not removed. The usual culprits are porous materials that absorbed urine: attic and crawl space insulation, drywall, subfloor, wood framing, and carpet padding. No air freshener or ozone treatment fixes a source still in the building.
A Post-Cleanup Verification Checklist
Before you decide the job is done, walk the space and confirm each item:
- No visible waste. No droppings, urine staining, or nesting material remain anywhere you can reach, including behind appliances, in cabinet corners, and along wall-floor junctions.
- No fresh droppings. Place a few small pieces of paper or a light dusting of flour along suspected travel paths. Check after 24 hours. Fresh tracks or droppings mean the infestation is still active and cleanup is premature.
- Surfaces are dry and clean. Disinfected surfaces have been allowed to air-dry after the full contact time, with no residue left on food-contact areas.
Troubleshooting Persistent Odor
Work from the most likely source outward:
- Re-inspect porous materials. Insulation, drywall, and carpet padding are the most common hidden reservoirs. If they were exposed to urine, replacement is usually the only real fix.
- Check wall cavities and ceiling voids. Urine runs downward and pools at the base of walls and in subfloor seams. Staining or a strong localized smell points to a cavity that needs to be opened and cleaned.
- Inspect HVAC components. If rodents traveled through ductwork, contamination can spread odor through the whole home. Ducts and filters may need cleaning or replacement.
- Treat hard surfaces with an enzymatic cleaner. Enzymatic products break down the proteins in urine rather than masking them. Give them the full dwell time on the label, then allow the surface to dry.
- Seal what cannot be replaced. On wood framing and subfloor that cannot be removed, an odor-blocking primer or shellac-based sealer can lock in residual odor after cleaning and disinfection.
- Re-check after a week. If odor returns within seven days, the source is still present. Repeat the inspection rather than reapplying deodorizer.
Do not use ozone generators or foggers as a substitute for removing the source. They can mask odor temporarily and, in occupied spaces, create their own health concerns. Remove the contamination first, then address residual odor.
When Odor Means Professional Help
Persistent odor after a thorough cleanup usually means contamination in a space you cannot safely access, inside a wall cavity, under a subfloor, or throughout attic insulation. That is when professional decontamination, such as rodent infestation cleanup, is the more efficient path.
When to Call a Professional for Rodent Waste Decontamination
Professional cleanup makes sense when contamination is heavy or hard to reach. Attics, crawl spaces, and wall cavities are the usual triggers.
Call a professional if you find any of these:
- Droppings spread across a large area
- Contamination inside insulation or HVAC ducts
- A strong odor that returns after cleaning
For landlords and property managers, professional decontamination also documents the work, which matters for tenant safety and future inspections.
At Rodent cleanup experts, our process covers removal of droppings and nesting materials, contaminated insulation removal, HEPA vacuuming, deep cleaning, and odor treatment.
Common Mistakes That Make Rodent Waste Decontamination Fail
Most failed cleanups share the same mistakes.
- Sweeping or dry vacuuming. This launches contaminated dust into the air.
- Skipping the respirator. Gloves alone do not protect your lungs.
- Using bleach on dirty surfaces. Organic matter weakens bleach. Clean first, then disinfect.
The single biggest failure is treating rodent waste like ordinary dirt. It is a biohazard. Dampen it, protect your lungs, disinfect with proper contact time, and dispose of everything in sealed bags.
Preventing Future Infestations After Cleanup
Cleanup fixes the mess; prevention keeps it from coming back. Start by finding entry points, rodents squeeze through gaps the size of a quarter. Check these spots:
- Foundation cracks and gaps
- Vents and utility openings
- Roof lines and attic vents
Seal openings with steel wool, copper mesh, or caulk. Rodents chew through foam and plastic, so use materials they cannot gnaw through.
Next, remove what attracts them: store food in sealed containers, fix leaky pipes, clear debris near the foundation, and trim branches away from the roof.
Finally, check the treated area every few weeks for new droppings.
Property managers and landlords who need documented, thorough sanitation after an infestation, especially in attics, crawl spaces, and multi-unit buildings.
Rodent waste cleanup is a biohazard job, not a chore.
Frequently Asked Questions
Is it safe to live in a home with mouse droppings?
It is not safe to live in a home with active mouse droppings until they are properly cleaned and disinfected. Rodent waste can carry bacteria and viruses that become airborne when disturbed. If you find droppings, ventilate the area, avoid sweeping or vacuuming dry waste, and use a disinfectant with adequate contact time. For heavy infestations or droppings in living spaces, professional rodent waste decontamination is the safest option.
Should you vacuum or sweep rodent droppings?
Never sweep or vacuum dry rodent droppings. Sweeping kicks contaminated dust into the air, and standard vacuums can blow pathogens through their exhaust. Instead, spray the droppings and surrounding surfaces with a disinfectant or bleach solution until thoroughly damp, wait the required contact time, then wipe up with disposable paper towels. Use a HEPA vacuum only after all waste has been removed and surfaces are disinfected.
What disinfectant should you use for rodent waste?
A household bleach solution made with 1 part bleach to 10 parts water works for most hard surfaces, but it needs at least 10 minutes of contact time to be effective. Commercial virucidal or enzyme-based cleaners are also good choices, especially for porous materials. Always check the label for the required contact time. For rodent urine cleanup and disinfection, enzyme cleaners help break down the proteins that cause lingering odors.
When should you hire a professional for rodent waste cleanup?
Call a professional when waste is in an enclosed space like an attic or crawlspace, when the infestation is heavy, when contaminated insulation or drywall needs removal, or when odors persist after DIY cleaning. Professionals have the protective equipment, HEPA vacuums, and disinfectants to handle large-scale rodent waste decontamination safely. They can also identify entry points to prevent rodents from returning.