
Table of Contents
- Why Preparation Matters Before Attic Cleaning
- Safety Gear and Attic Access Preparation
- Decluttering and Documenting Items for Insurance
- Pre-Cleaning Electrical and HVAC Safety Checklist
- How to Sanitize Attic After Rodent Infestation: What to Leave to the Pros
- The Attic Rodent Damage Restoration Process Explained
- What the Cost of Professional Attic Cleanup Includes
- Frequently Asked Questions
Last Updated: September 21, 2026
Why Preparation Matters Before Attic Cleaning
Knowing how to prepare your attic for professional cleaning cuts the job time, the risk, and often the bill. Learning how to prepare your attic for professional cleaning is mostly about access, safety, and getting fragile or valuable items out of the way.
Three things drive the whole process:
- Access. The crew needs a clear path to the hatch and across the joists.
- Safety. Rodent droppings, dust, and old insulation are the real hazards, not the clutter.
- Documentation. Photos and notes help with insurance claims later.
Safety Gear and Attic Access Preparation
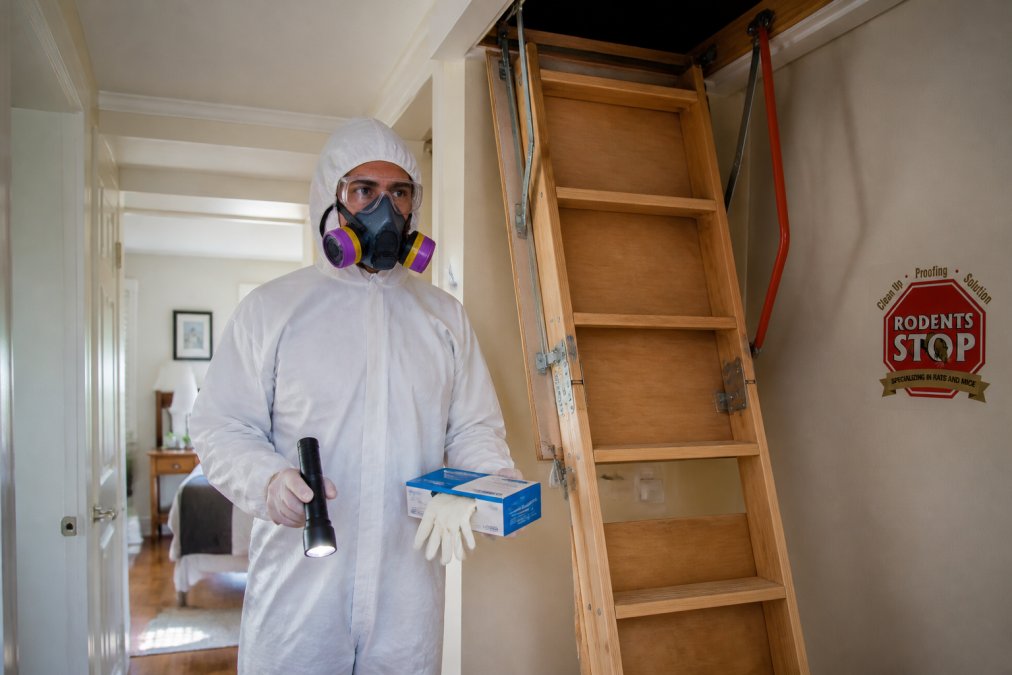
Safety gear comes first, before you move a single box. Attics hold dust, insulation fibers, and rodent waste, and all three get into the air the moment you disturb them.
Personal Protective Equipment You’ll Need
You don’t need a full hazmat setup for light prep work. You do need the basics:
- Respirator mask rated N95 or higher, fitted snugly
- Safety goggles that seal around the eyes
- Disposable gloves, plus a second pair for the dirty work
- Protective suit or old long sleeves and pants you can wash hot
- Boots or closed shoes you can wipe down
- A bright flashlight or headlamp
Never dry-sweep or vacuum rodent droppings with a shop vac. That pushes contaminated dust into the air you’re breathing. Wet the area with a spray bottle first, then wipe.
Making the Attic Hatch and Crawl Space Accessible
Clear the space around the attic hatch and any crawl space opening before the crew arrives. Move cars out of the garage if the hatch sits there. Pull back shelving, bikes, and stored boxes.
Then check the path inside:
- Remove items blocking the first few joists
- Trim back loose insulation around the hatch so it doesn’t tear
- Make sure the ladder or stairs fold down fully and lock
Decluttering and Documenting Items for Insurance
Decluttering is the step most people rush, and it’s the one that saves the most time. Pull out anything you don’t want exposed to dust, chemicals, or foot traffic.
Start with these categories:
- Keep and clean: furniture, tools, seasonal decor
- Toss: anything soaked, chewed, or covered in droppings
- Store elsewhere: paper records, fabric, electronics, anything porous
Why Documentation Matters Before the Crew Arrives
Most guides tell you to throw out contaminated items and move on. That advice leaves money on the table. If rodents chewed stored goods, soaked boxes, or ruined electronics, your homeowner’s or renter’s policy may cover part of the loss, but only if you can show what was there and what condition it was in before cleanup started.
Building a Claim-Ready Inventory
You don’t need an app or a spreadsheet program. A phone camera and a notes app will do. The goal is a record that answers three questions for each item: what was it, what condition was it in, and what did it look like before anyone touched it.
For each item you remove, capture:
- A wide shot showing the item in its original location
- A close-up of any damage, chewed corners, droppings, water staining, mold
- A note with the item name, approximate age, and whether it’s replaceable or irreplaceable
- A condition rating so the record is consistent across dozens of items
A simple condition scale keeps the list usable:
| Rating | What it means | Example |
|---|---|---|
| Intact | No visible damage | Sealed plastic tote |
| Surface contamination | Dust or droppings on the outside only | Cardboard box with droppings on lid |
| Damaged | Chewed, torn, or crushed | Gnawed corner on a holiday bin |
| Ruined | Soaked, molded, or structurally compromised | Water-stained file box |
What to Hand the Crew Lead
Before work starts, give the crew lead a one-page summary: which items are staying, which are being discarded, and which are documented for a claim. This prevents two common problems, the crew accidentally discarding something you meant to keep, and the crew moving a damaged item before you’ve photographed it.
Photograph the contaminated area before anyone touches it. Insurers and cleanup crews both want to see the “before” state, and it’s gone once work starts. Take the wide shots first, then the close-ups, then start moving anything.
Items That Need Special Handling
Some items shouldn’t go in a standard discard pile even if they’re ruined:
- Electronics, check for corrosion or rodent damage before discarding; some components may be recyclable
- Paper records, tax documents, titles, and insurance policies should be separated and reviewed before disposal
- Fabric and upholstery, heavily contaminated items may need to be bagged and sealed before removal to avoid spreading dust through the house
- Anything with visible mold, bag it in place rather than carrying it through living areas
Pre-Cleaning Electrical and HVAC Safety Checklist
Electrical and HVAC checks come before any cleaning, not after. Water, dust, and loose debris around live wiring are a shock and fire risk, and attic-based air handlers pull contaminated air straight into your living space if they’re running during cleanup.
Powering Down Safely
Start at the main panel, not in the attic. Identify the breaker that controls attic lighting, outlets, and any attic-mounted equipment. Label it with tape so nobody flips it back on mid-job.
Protecting HVAC Equipment
Attic-based air handlers, flex ducts, and return plenums are the most vulnerable equipment in the space. Dust and insulation fibers pulled into a running system will circulate through every room in the house.
Before the crew arrives:
- Turn off the HVAC system at the thermostat and, if possible, at the disconnect switch near the air handler
- Cover the return and supply grilles inside the house with plastic sheeting and painter’s tape, this is the step most homeowners skip, and it’s the one that keeps attic dust out of living spaces
- Seal or bag exposed flex duct connections with plastic wrap and tape so debris can’t enter open duct ends
- Cover the air handler cabinet with a fitted plastic cover or taped sheeting if the unit stays in place during cleaning
- Check the condensate drain pan for standing water, if there’s water, address it before work starts, because wet debris around electrical components is a shock hazard
Electrical Inspection Checklist
- No exposed or chewed wiring near the work zone
- Recessed lighting fixtures are covered or taped off
- Any junction boxes are closed and dry
- No standing water near the air handler or any outlet
- No scorch marks, melted insulation, or burning smell near wiring
- All attic outlets are either covered or confirmed dead at the panel
If you spot chewed wire or a scorched outlet, stop and call an electrician. Rodents gnaw wiring, and that damage is a real fire hazard, not a cosmetic problem. A licensed electrician can assess whether the circuit is safe to leave energized during cleaning or needs repair first.
Never assume a breaker labeled “attic” controls everything in the attic. Attic circuits are often tied into bedroom or hallway breakers, and a mislabeled panel is common. Verify with a tester before anyone works near wiring.
What to Tell the Crew Lead
Hand the crew lead a short verbal or written summary: which breaker is off, where the panel is, whether the HVAC is shut down, and whether any wiring looked damaged during your walkthrough. This takes two minutes and prevents the most common cause of mid-job delays, the crew discovering a live circuit or a running air handler after they’ve already started.
How to Sanitize Attic After Rodent Infestation: What to Leave to the Pros
Sanitizing an attic after a rodent infestation is not a DIY job. Droppings, urine, and nesting material carry bacteria and allergens, and a household vacuum spreads them rather than removing them.
What the pros handle instead:
- HEPA vacuuming of every surface, including joists and kneewalls
- Removal of contaminated insulation, which can’t be cleaned once soaked
- Deep cleaning and sanitizing with products rated for biohazard cleanup
- Odor and pheromone treatment to break the scent trail
- Vapor barrier and air filtration work where moisture is a problem
The Attic Rodent Damage Restoration Process Explained
Restoration goes beyond cleaning. It repairs what the rodents wrecked and closes the gaps they used to get in.
The process typically runs in this order:
- Inspection. Find entry points, nesting sites, and damaged materials.
- Containment. Seal off the work area to keep dust from spreading.
- Removal. Pull out droppings, nests, and ruined insulation.
- Sanitizing. HEPA vacuum, then apply sanitizing treatment.
- Odor treatment. Neutralize pheromones and lingering smells.
- Insulation replacement. Install fresh insulation and vapor barrier.
- Entry sealing. Close gaps so rodents can’t return.
What the Cost of Professional Attic Cleanup Includes
The cost of professional attic cleanup depends on attic size, contamination level, and how much insulation needs replacing. No two quotes look alike, and that’s normal.
Most estimates factor in:
- Square footage and accessibility
- Severity of contamination
- Insulation removal and replacement
- Odor treatment and sanitizing
- Entry point sealing
Frequently Asked Questions
What should I remove from my attic before professional cleaning?
Clear out boxes, holiday decorations, furniture, and any stored items you want to keep. Anything porous that shows rodent damage, like cardboard, fabric, or paper, should be discarded rather than saved. Take photos of damaged items before tossing them for insurance purposes. Leave insulation, wiring, and built-in fixtures in place for the crew to handle.
How do I safely prepare an attic for rodent waste removal?
Wear a respirator mask, protective suit, safety goggles, and disposable gloves before entering. Open the attic hatch to let air move through, and avoid sweeping or vacuuming dry droppings with a standard vacuum, since that stirs up dust and biohazard particles. Set up a bright work light, clear a path to the contaminated area, and let the professional crew handle the actual removal and decontamination.
Do I need to be home when professionals clean my attic?
You do not have to stay for the full job, but someone 18 or older should be present at the start to unlock the attic hatch, confirm the scope of work, and point out any concerns. After that, most crews can work independently. If you have pets, keep them in a closed room or arrange boarding until the team finishes and the treated area is dry.
How long does professional attic sanitation take?
Most single-family attic cleanups take one to two days, depending on square footage, how much insulation has to come out, and whether mold or heavy rodent damage is present. Larger jobs or properties with HVAC duct contamination can run longer. Ask your provider for a written timeline before work starts so you can plan around it.
Dealing with a rodent-damaged attic is stressful, and the prep work can feel overwhelming on top of it. Rodent cleanup experts handles the parts that matter most: HEPA vacuuming, contaminated insulation removal, deep sanitizing, odor and pheromone treatment, and entry point sealing across Los Angeles, Ventura, San Bernardino, Riverside, and Orange Counties. Get started with Rodent cleanup experts and restore your attic to a clean, safe, rodent-free space.