Last Updated: October 24, 2026
Quick Summary
To sanitize home vents after rodent activity, shut off the system at the thermostat and breaker, then HEPA vacuum reachable ducts and grilles before washing hard surfaces with detergent and disinfecting with a product that stays wet for its full label contact time. Replace the filter and any chewed flex duct, then dry everything fully before restarting the system.
- Never dry-sweep or vacuum droppings with a shop vac, which aerosolizes pathogens and allergens.
- Work from the farthest register back toward the air handler so debris is not dragged through clean sections.
- Disinfectant must stay visibly wet for the label’s contact time, often around 10 minutes.
- Porous insulation soaked with urine or packed with nesting material must be removed and replaced.
- If odor returns within a few days of cleaning, contamination remains in a hidden section.
Table of Contents
- Recognize Rodent Contamination in Your HVAC System
- Shut Down and Isolate the System Before You Start
- How to Clean Mouse Droppings Safely
- Clean and Disinfect Ductwork, Registers, and Components
- Schedule an HVAC System Inspection After Rodent Infestation
- Know When to Call for Professional Air Duct Cleaning After Rodents
- Prevent Reinfestation and Confirm the Job Is Done
- Frequently Asked Questions
Recognize Rodent Contamination in Your HVAC System
Rodent contamination in an HVAC system, the presence of droppings, urine, nesting material, hair, or carcasses inside ducts, on registers, or around the air handler, is why you need to sanitize home vents thoroughly.
Here is what to look for before you touch anything:
- Droppings near vents, on top of duct runs, or inside the return plenum
- Urine stains as dark rings or yellow-brown streaks on insulation and joists
- Nesting material such as shredded paper, fabric, or insulation fibers
Rodent allergens can turn up in homes, schools, and hospitals alike, according to research on rodent allergen exposure. If you want the full picture of what rodents do to a system, read our breakdown of how rodents damage HVAC systems.
Shut Down and Isolate the System Before You Start
Turn the system off at the thermostat first, then cut power at the breaker panel. This stops the blower from pushing dust and airborne particles through the house while you work. It also protects the equipment from debris you dislodge.
Next, isolate the work area:
- Seal supply and return registers with plastic sheeting and tape.
- Close doors between the work zone and living spaces.
- Open exterior windows in the work area for ventilation.
- Keep pets and children out until cleanup is finished.
Watch out: running the fan “to clear the air” spreads contamination instead of removing it. Leave the system off until every contaminated surface is clean and dry.
How to Clean Mouse Droppings Safely
Never dry-sweep or vacuum droppings with a shop vac. That aerosolizes pathogens and rodent allergens. The CDC’s rodent cleanup guidance calls for spraying droppings and urine with a bleach solution before removal, using CDC guidance on cleaning up after rodents.
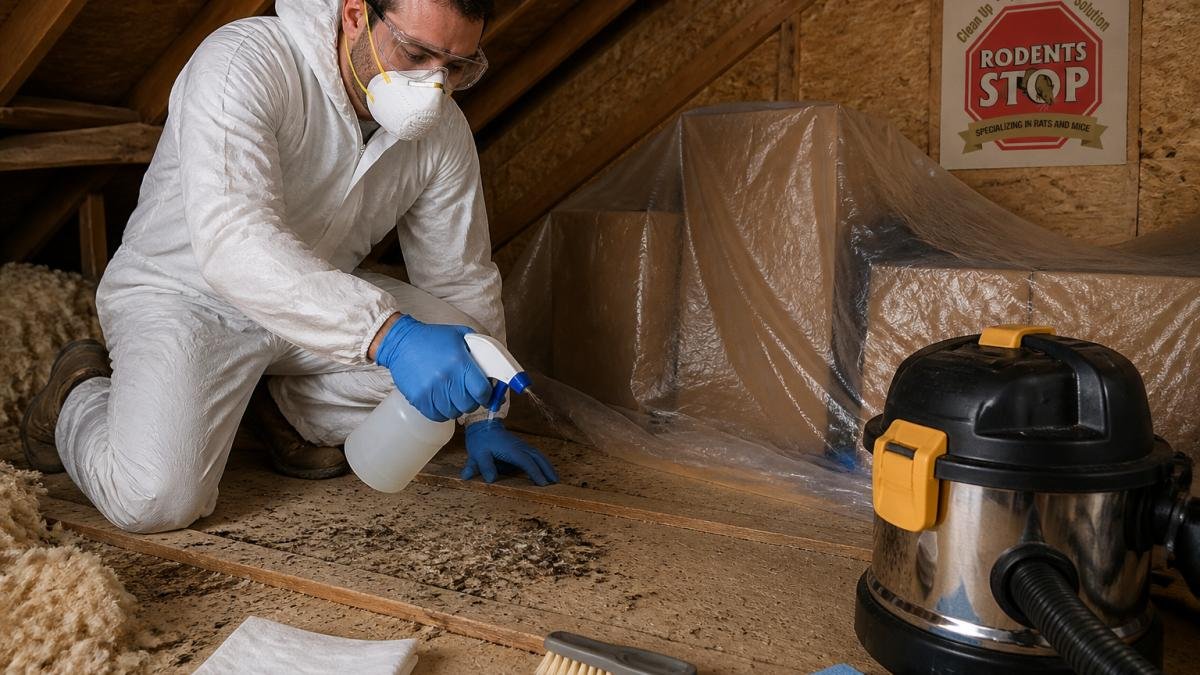
Suit up first:
- Gloves (rubber or nitrile, not thin disposables)
- Eye protection and an N95 respirator
- Disposable coveralls if the area is heavily soiled
Then work in this order:
- Mist droppings, urine, and nesting material until damp. Do not soak.
- Wipe up with paper towels and place everything in double heavy-duty bags.
- Spray the surface again and let it sit before wiping clean.
- Bag and seal used PPE last, then wash hands and shower.
Our guide on how to remove rodent droppings safely walks through PPE, bagging, and disposal in more detail.
Clean and Disinfect Ductwork, Registers, and Components
Cleaning and disinfecting are two separate steps, and the order matters. The National Center for Healthy Housing describes a clean-first, disinfect-second process and warns against treating disinfection as a substitute for cleaning. Dirt shields germs, so disinfectant sprayed onto a soiled surface does little. The sequence below is written specifically for home ventilation systems, not generic surfaces, and it fills a gap most published guides skip: what to do at each component, which disinfectant to choose, and how long to leave it wet.
Step 1: HEPA vacuum before anything gets wet
Work from the farthest register back toward the air handler so you are not dragging debris through clean sections. Use a HEPA vacuum with a hose and brush attachment on reachable duct interiors, boots, and register grilles. A shop vac without HEPA filtration will exhaust fine rodent dust back into the room, which defeats the purpose. Bag the vacuum canister contents in double heavy-duty bags when you finish.
Step 2: Wash hard surfaces with detergent
Detergent lifts the protein film left by urine and droppings; disinfectant alone does not. Mix a mild dish detergent with warm water, wipe metal duct interiors, boots, grilles, and the air handler cabinet, then rinse with a clean damp cloth. Do not flood seams or insulation, moisture trapped in ductwork feeds mold.
Step 3: Disinfect with the right product and honor contact time
This is where most guides go vague. Choose a disinfectant labeled for HVAC or hard non-porous surfaces and read the label for three things: the dilution ratio, the required wet contact time, and whether it is approved for the surface you are treating. Common options include:
- EPA-registered quaternary ammonium disinfectants, widely available, effective on hard surfaces, and typically require the surface to stay visibly wet for the label’s stated contact time (often around 10 minutes; confirm on the label).
- Bleach solution, the CDC’s rodent cleanup guidance uses a diluted household bleach solution for droppings and urine. Mix fresh, never combine with other cleaners, and ventilate the area.
- Hydrogen peroxide-based disinfectants, useful where bleach odor or corrosion is a concern on metal components.
Whatever you choose, the surface must stay wet for the full contact time. If it dries early, reapply. Do not spray disinfectant into a running system, and do not mix products.
Step 4: Component-by-component checklist
| Component | What to Do | Watch For |
|---|---|---|
| Return and supply grilles | Remove, HEPA vacuum both sides, wash, disinfect, dry before reinstalling | Bent louvers, debris trapped behind the frame |
| Flex duct runs | HEPA vacuum reachable sections; replace any run with chewed jacket, urine soak, or nesting material | Tears, sagging, crushed sections |
| Rigid duct interiors | HEPA vacuum, wipe with detergent where reachable, disinfect | Seam separation, rust |
| Air handler cabinet | Power off at breaker, wipe interior panels, HEPA vacuum debris from the base | Droppings pooled in the cabinet floor |
| Blower compartment | HEPA vacuum the wheel and housing; wipe accessible surfaces | Unbalanced wheel from debris, gnawed wiring nearby |
| Evaporator coil | HEPA vacuum the face; leave deep cleaning to a technician | Bent fins, standing water in the drain pan |
| Drain pan and condensate line | Empty, scrub, disinfect, confirm the line flows | Biofilm, standing water, rodent hair |
| Filter | Replace, do not clean and reuse | Wrong size, gaps around the frame |
Step 5: Dry fully, then inspect
Let every surface dry before reinstalling grilles or restarting the system. Moisture left in ductwork is a mold risk and can reactivate odor. Once dry, run the fan on low with registers open and check for odor at each vent.
A common mistake is skipping the air handler. It sits downstream of the return, so it collects whatever the ducts pull in. For deeper vent-specific protocols, see our step-by-step guide to cleaning rodent-damaged HVAC vents.
Do not fog, mist, or spray disinfectant into ductwork while the system is running, and do not use ozone generators as a substitute for cleaning. Neither removes the source, and both can create new indoor air problems.
| Step | Task | What Success Looks Like |
|---|---|---|
| 1 | HEPA vacuum ducts and grilles | No visible debris or dust trails |
| 2 | Wash with detergent | Surfaces look clean, not just wet |
| 3 | Disinfect and honor contact time | Label directions followed exactly |
| 4 | Replace filter and damaged duct | New filter seated, no tears |
| 5 | Dry and inspect | No moisture, no odor when air runs |
Schedule an HVAC System Inspection After Rodent Infestation
An HVAC system inspection after rodent infestation is a hands-on check of the air handler, duct runs, insulation, and wiring for damage that cleaning alone cannot fix. Book it once the visible mess is gone but before you restart the system.
The inspector should confirm:
- No remaining nesting material or carcasses in hidden duct sections
- Duct joints and flex runs are intact, not chewed through
- Insulation is replaced where urine soaked in
If you are unsure whether rodents are still present, our article on how to tell if rodents are living in your vents covers the signs to check first.
Know When to Call for Professional Air Duct Cleaning After Rodents
Professional air duct cleaning after rodents is the right call when contamination reaches beyond what you can safely reach or verify. Most guides stop at “call a pro if it’s bad.” This section gives you decision criteria, based on contamination extent, duct material, accessibility, and HVAC damage, so you can draw the line yourself.
What a homeowner can reasonably handle
- Surface cleaning of reachable supply and return grilles
- Filter replacement
- Wiping the exterior of the air handler cabinet
If the contamination is limited to grilles and the filter, and you can see every affected surface, it is reasonable to sanitize home vents yourself.
What requires a licensed HVAC technician or remediation crew
Call a professional when any of the following is true:
- Contamination is inside duct runs you cannot access. Flex duct in a closed chase, ductwork buried in insulation, or runs behind finished walls cannot be verified clean by eye.
- Insulation is soaked with urine or packed with nesting material. Porous insulation cannot be cleaned; it has to be removed and replaced.
- Duct material is damaged. Chewed flex duct, torn duct board, or separated rigid duct seams need repair or replacement, not just cleaning.
What to ask before you hire
- Will you inspect the air handler and all accessible duct runs, not just the grilles?
- Do you HEPA vacuum before applying any disinfectant?
- Will you remove and replace contaminated insulation and damaged flex duct?
A crew that cannot answer these clearly is not set up for rodent remediation, only routine duct cleaning.
At Rodent Cleanup Experts, we remove droppings and nesting material, pull contaminated insulation, HEPA vacuum, deep clean and sanitize, and treat odor and pheromones. We serve homeowners, landlords, and property managers across Los Angeles, Ventura, San Bernardino, Riverside, and Orange Counties.
If you cannot see every contaminated surface, cannot verify the air handler is clean, or smell odor returning after your own cleanup, stop and call a professional. The cost of a re-clean is higher than the cost of doing it once, correctly.
Prevent Reinfestation and Confirm the Job Is Done
Reinfestation prevention starts with exclusion, not traps. Rodents follow scent trails and squeeze through gaps you would not notice. Sealing entry points is what keeps them out for good.
Run this checklist:
- Walk the exterior and seal gaps around pipes, vents, and utility lines
- Repair torn vent screens and crawl space doors
- Trim branches back from the roofline
To confirm the job is done, run the system on low and check for odor, then inspect registers for new debris after a week. Our guide on preventing rodents from returning after cleanup covers sealing materials and follow-up steps.
Rodent contamination in vents is one of those jobs where the visible mess is the easy part. Hidden droppings, soaked insulation, and pheromone trails are what bring the problem back.
Frequently Asked Questions
Is it safe to run the HVAC system after finding rodent droppings in a vent?
No. Running the system can blow rodent allergens, dust, and pathogens through the ducts and into every room. Shut the system off at the thermostat and the breaker panel before you inspect or clean anything. The CDC recommends spraying droppings and urine with a disinfectant before removal, and the EPA notes that source control, not ventilation, is the most effective way to improve indoor air quality. Keep the system off until the ductwork and components have been cleaned and inspected.
Can I clean rodent droppings from air ducts myself?
You can handle light contamination on accessible surfaces like registers and return-air grilles, but ducts and contaminated insulation usually call for professional air duct cleaning after rodents. Duct interiors are hard to reach, and a standard shop vacuum can aerosolize pathogens. The National Center for Healthy Housing stresses cleaning before disinfecting, and the CDC advises a bleach solution of 1.5 cups per gallon for affected surfaces. If droppings are inside the ductwork or insulation is soaked with urine, hire a licensed remediation or HVAC professional.
How do professionals clean rodent-contaminated HVAC systems?
Professionals isolate the system, wear personal protective equipment, and use HEPA vacuums to capture droppings, nesting material, and dust without spreading them. They remove contaminated insulation, clean and disinfect duct interiors and components, and verify the work before restoring airflow. An HVAC system inspection after rodent infestation also checks for chewed wiring and damaged flex duct. Ask any provider how they confirm cleanup is complete and whether they treat odors and pheromones, since those are common reasons smells return.
When should I replace insulation or ductwork after rodent activity?
Replace insulation that is soaked with urine, packed with nesting material, or visibly contaminated, because it cannot be reliably cleaned. Replace flexible duct sections that are torn, chewed, or saturated. Rigid metal ductwork can usually be cleaned and disinfected if it is intact. Have an HVAC system inspection after rodent infestation to check for chewed wiring and gaps at joints, and seal entry points around the unit and duct runs so rodents cannot get back in.
