Table of Contents
- What Determines How Long Rodent Cleanup Takes
- Rodent Droppings Health Risks: Why Speed Matters
- The Professional Rodent Decontamination Process: Step by Step
- How to Sanitize an Attic After a Rat Infestation
- Cleanup Timelines by Area: Attic, Crawl Space, and Walls
- When to Call a Professional vs. DIY Cleanup
- Post-Cleanup Prevention and Maintenance Schedule
- Frequently Asked Questions
Last Updated: September 13, 2026
What Determines How Long Rodent Cleanup Takes
Most homeowners underestimate this job by a wide margin. Rodent cleanup is not a single task; it is a sequence of inspection, containment, removal, disinfection, and verification steps, and the clock only stops when the last step passes. At Rodent cleanup experts, we’ve walked hundreds of attics and crawl spaces across Los Angeles, Ventura, San Bernardino, Riverside, and Orange Counties, and the honest answer is that a light, contained problem can wrap up in a single visit while a long-running infestation in contaminated insulation can stretch across several days. The variables below are what actually move the timeline.
Infestation Severity and Affected Area
Severity is the single biggest factor. A few fresh droppings along one attic joist is a different job than years of accumulated fecal matter, urine stains, and nesting materials spread across insulation batting.
- Light: isolated droppings, no nesting, one small area. Typically one visit.
- Moderate: active nesting, soiled insulation in one zone, noticeable odor. Usually two to three visits.
- Severe: widespread contamination, saturated insulation, structural damage, odor throughout the home. Often a multi-day project with follow-up checks.
Square footage matters just as much. A 400-square-foot garage is not a 2,000-square-foot attic with a maze of HVAC runs.
Contamination Level and Material Type
Porous materials absorb and hold contamination in ways hard surfaces do not. Insulation, drywall paper, cardboard, and fabric often cannot be cleaned and must be removed and replaced. That removal adds time, disposal cost, and a replacement step.
Hard surfaces such as concrete, framing lumber, and metal ductwork can usually be decontaminated in place, which keeps the job shorter. The material type, not just the visible mess, decides whether you’re cleaning or replacing.
Rodent Droppings Health Risks: Why Speed Matters
Rodent droppings health risks are the reason this is not a “get to it this weekend” chore. Rodent urine and fecal matter can carry pathogens, and dried droppings release airborne particles when disturbed. According to the CDC guidance on rodent-borne diseases, hantavirus and other illnesses are linked to inhaling contaminated dust, which is why sweeping or vacuuming dry droppings with a shop vac is one of the worst things you can do. The EPA’s indoor air quality resources also note that rodent allergens can linger in settled dust long after the animals are gone.
That means speed is not about convenience. Every day contamination sits, it spreads further into insulation and ductwork, and the cleanup window grows. Improper DIY cleanup, especially with a standard vacuum, can aerosolize pathogens and cross-contaminate clean rooms of the house.
Never dry-sweep or use a household vacuum on rodent droppings. It launches contaminated dust into the air you and your family breathe and pushes pathogens deeper into the room.
The Professional Rodent Decontamination Process: Step by Step
The professional rodent decontamination process follows a fixed order because skipping a step defeats the next one. Here is how a proper job runs.
Safety Protocols and Personal Protective Equipment
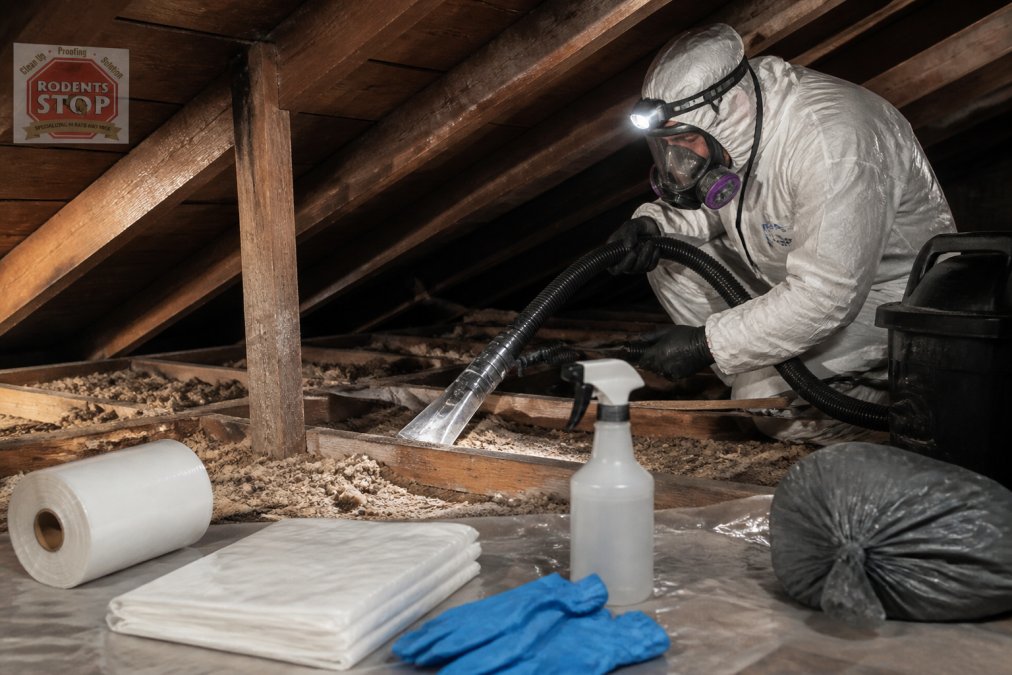
Personal protective equipment is the first line of defense and it is not optional. A properly fitted respirator, disposable coveralls, nitrile or latex gloves, eye protection, and boot covers keep technicians from inhaling or carrying contamination out of the work zone. The OSHA guidance on respiratory protection explains why a fitted respirator, not a dust mask, is required when airborne hazards are present.
Containment comes next: sealing doorways, covering vents, and setting negative air pressure so disturbed particles do not drift into living spaces. A HEPA filter captures particles that a standard vacuum would recirculate.
Disinfection and Disposal of Nesting Materials
Once debris is bagged and removed, every affected surface gets treated. A bleach solution or a commercial disinfectant is applied and left for the full soak time listed on the label, because contact time is what kills pathogens, not the strength of the mix. Nesting materials, soiled insulation, and contaminated cardboard go into sealed heavy-duty bags and are disposed of per local rules.
Read the disinfectant label for its required soak time and match it. A quick wipe with bleach does almost nothing; the surface has to stay wet for the full contact window.
How to Sanitize an Attic After a Rat Infestation
Knowing how to sanitize an attic after a rat infestation starts with the order of operations: remove, then clean, then disinfect, then verify. Removing contaminated insulation and nesting material comes first, because disinfecting over debris is wasted effort.
After removal, HEPA vacuum all surfaces, including joists, rafters, and ductwork exteriors. Then apply disinfectant and respect the soak time. Finish with an odor and pheromone treatment, since residual scent can draw new rodents back. A final inspection confirms no missed droppings or nesting pockets remain.
| Phase | What Happens | Typical Time |
|---|---|---|
| Removal | Bag droppings, nesting, soiled insulation | 2-4 hours |
| HEPA vacuuming | All surfaces, ducts, cavities | 1-3 hours |
| Disinfection | Apply and soak per label | 1-2 hours |
| Odor treatment | Neutralize pheromones and scent | 1-2 hours |
| Verification | Re-inspect and confirm clean | 1 hour |
Cleanup Timelines by Area: Attic, Crawl Space, and Walls
Different zones carry different timelines because access, material, and surface type all change the work. Most guides stop at “attic versus crawl space” and never address the surface itself, which is the variable homeowners actually search for. The surface under the contamination decides whether you clean in place or remove and replace, and that single decision can double or halve the job.
Attic
Attics run longest because of insulation volume and heat. Blown-in fiberglass or cellulose that has been soiled usually cannot be cleaned and must be vacuumed out, bagged, and replaced, which adds a removal and a reinstall phase. A 1,200-square-foot attic with soiled insulation commonly runs two to three days across multiple visits. An attic with only hard surfaces and isolated droppings can finish in a single visit.
Crawl Space
Crawl spaces are quicker to access but often hold more moisture and debris. A low crawl space entered on your stomach is slower per square foot than a walk-in attic. Vapor barrier sheeting that has been contaminated is typically removed and replaced rather than scrubbed. Expect one to two days for a moderate crawl space, longer if the soil itself is saturated with urine.
Wall Voids
Wall contamination tends to be localized but fiddly. Technicians cut small access points and work section by section, and drywall repair is often needed afterward. A single wall cavity with nesting material can take two to four hours; contamination running along a chase or multiple stud bays can push past a full day.
Cleanup by Flooring and Surface Type
This is the part most guides skip, and it is where timelines actually diverge.
| Surface | Typical Approach | Relative Time |
|---|---|---|
| Carpet | Usually removed and disposed of; padding is almost never salvageable | Fast removal, replacement adds time |
| Hardwood | HEPA vacuum, then disinfect in place; urine staining may require sanding and refinishing | Moderate, refinishing adds a phase |
| Concrete | HEPA vacuum, then disinfect in place; porous stains may need repeated soak cycles | Fastest to clean |
| Framing lumber | HEPA vacuum and disinfect in place; deeply soaked wood may need replacement | Moderate |
| Metal ductwork | HEPA vacuum interior and exterior, then disinfect; flex duct is often replaced | Moderate to slow |
| Insulation (any type) | Removed and replaced, never cleaned | Slowest, adds removal and reinstall |
A severe infestation touching all three zones plus carpet and insulation can push a job past a single day and into a multi-visit project. The takeaway is that the surface, not just the square footage, sets the clock.
Ask any provider how they handle your specific flooring and insulation before you compare timelines. A quote that ignores surface type is a quote that will change once work begins.
When to Call a Professional vs. DIY Cleanup
DIY makes sense for a tiny, fresh, hard-surface problem with proper gear and no insulation involvement. Everything else favors a professional. The deciding factors are contamination volume, porous materials, odor that persists, and any sign of a severe infestation such as gnawed wiring or droppings in multiple rooms.
Homeowners and landlords dealing with contaminated insulation, persistent odor, or droppings in attics, crawl spaces, and walls across Southern California.
Rodent cleanup experts handles the full scope: removal of droppings and nesting materials, contaminated insulation removal, HEPA vacuuming, deep cleaning and sanitizing, odor and pheromone treatment, and replacement of damaged insulation. We inspect first, then build a plan around the actual condition of the property, and we identify likely entry points so rodents have a harder time returning. If you would rather hand the whole job off, our rodent infestation cleanup covers every step from removal through verification.
Post-Cleanup Prevention and Maintenance Schedule
Cleanup without prevention is a temporary fix. Exclusion, or sealing entry points, is what stops the cycle, and it should be paired with a structured maintenance routine. Most guides hand you a loose checklist and stop there. What follows is a 12-month schedule you can actually run, because the properties that stay rodent-free are the ones where someone is looking on a cadence, not once after a scare.
Why a Schedule Beats a One-Time Fix
Rodents re-enter through the same weaknesses that let them in the first time, and new gaps open with weather, settling, and roof work. A single inspection after cleanup catches the current problem; a recurring schedule catches the next one before it becomes an infestation. The goal is to make your property a harder target every season.
The 12-Month Maintenance Checklist
Month 1 (immediately after cleanup)
- Walk the exterior and seal every gap larger than a quarter inch with copper mesh or steel wool plus sealant
- Confirm all attic and crawl space vents are intact and screened
- Verify the post-cleanup inspection found no missed droppings or nesting pockets
Month 3
- Re-inspect the attic and crawl space for new droppings or rub marks
- Check door sweeps and garage door seals for wear
- Trim any tree branches that have grown back toward the roofline
Month 6
- Inspect the roof line, soffits, and fascia for new gaps or chew marks
- Check utility penetrations (plumbing, electrical, HVAC lines) for unsealed openings
- Refresh bait stations or traps in monitoring locations if used
Month 9
- Re-check stored items in the garage and attic for nesting activity
- Confirm food and pet food are still in sealed containers
- Inspect the foundation perimeter for new cracks or burrows
Month 12
- Full seasonal re-inspection of attic, crawl space, and wall voids
- Schedule a professional re-check, especially after heavy rain or roof work
- Replace any worn weatherstripping or vent screens
Seasonal Triggers to Watch
- Fall: rodents move indoors as temperatures drop; seal entry points before the first cold snap.
- Winter: roof and gutter damage from storms can open new access; inspect after every major storm.
- Spring: nesting season begins; watch for new droppings and nesting material in attics and garages.
- Summer: heat drives rodents toward cooler spaces; check crawl spaces and wall voids.
When to Escalate
If any inspection turns up fresh droppings, gnaw marks, or a persistent odor, treat it as a new problem rather than a maintenance item. Re-inspection and, if needed, a fresh cleanup plan are the right next step. Catching it early is what keeps a one-visit job from becoming a multi-day project.
Put the 12-month dates in your phone calendar now, with a reminder two weeks before each check. A schedule you do not track is a schedule you will skip.
Frequently Asked Questions
What is the 5-day mouse rule for sanitation?
The 5-day mouse rule refers to the time it takes for mouse droppings to become a significant health hazard if left untreated. Fresh droppings can carry pathogens like hantavirus, and after five days, the risk of airborne particles increases. Professional sanitation within this window is recommended to prevent health issues.
How long do rodent droppings remain a health hazard?
Rodent droppings can remain hazardous for weeks or even months if not properly disinfected. Pathogens such as hantavirus and salmonella can survive in dried droppings, and disturbing them can release infectious particles into the air. Proper cleanup with disinfectants and HEPA filtration is essential to eliminate the risk.
Does the size of the infestation impact the total cleanup duration?
Yes, the size of the infestation directly affects how long rodent cleanup takes. A small infestation in a single area might take 4-6 hours, while a severe infestation affecting multiple rooms or the entire attic can take 12-24 hours or more. The extent of contamination and amount of nesting materials also play a role.
What steps are involved in professional rodent decontamination?
Professional rodent decontamination involves several steps: inspection to assess the infestation, removal of droppings and nesting materials, HEPA vacuuming to capture airborne particles, disinfection of all surfaces, odor treatment, and sealing entry points. The process ensures a safe and sanitary environment, typically taking several hours to complete.