
Table of Contents
- What You’ll Need Before You Start
- Step 1: Gear Up for Rodent Droppings Cleanup Safety
- Step 2: Remove Contaminated Insulation and Nesting Material
- Step 3: HEPA Vacuuming and Dry Debris Removal
- Step 4: Choose the Best Disinfectant for Rodent Urine and Droppings
- Step 5: How to Sanitize Attic Surfaces and Seal Entry Points
- Step 6: Waste Disposal and Long-Term Monitoring After Sanitization
- DIY vs. Professional Attic Remediation: Cost-Benefit Analysis
- Frequently Asked Questions
Last Updated: September 16, 2026
What You’ll Need Before You Start
Sanitizing an attic after an infestation is a biohazard cleanup job, not a weekend dusting project. Rodent droppings, urine, and nesting material carry pathogens that become airborne the moment you disturb them, and a standard shop vacuum blows that contamination straight back into your living space.
This guide walks through how to sanitize an attic after infestation in six steps. Before you climb up there, gather the following:
- PPE: N95 respirator (fit-tested if possible), disposable coveralls, nitrile gloves, sealed goggles
- Containment: 6-mil plastic sheeting, painter’s tape, zip ties
- Removal: Heavy-duty contractor bags, a pry bar, a putty knife
- Cleaning: A HEPA-filter vacuum, a pump sprayer, disposable rags
- Chemistry: A bleach solution or a dedicated disinfectant, plus an enzymatic cleaner
- Sealing: Copper mesh, steel wool, exterior-grade sealant, 1/4-inch hardware cloth
A common mistake is buying a fogger before confirming you have a HEPA vacuum.
Step 1: Gear Up for Rodent Droppings Cleanup Safety
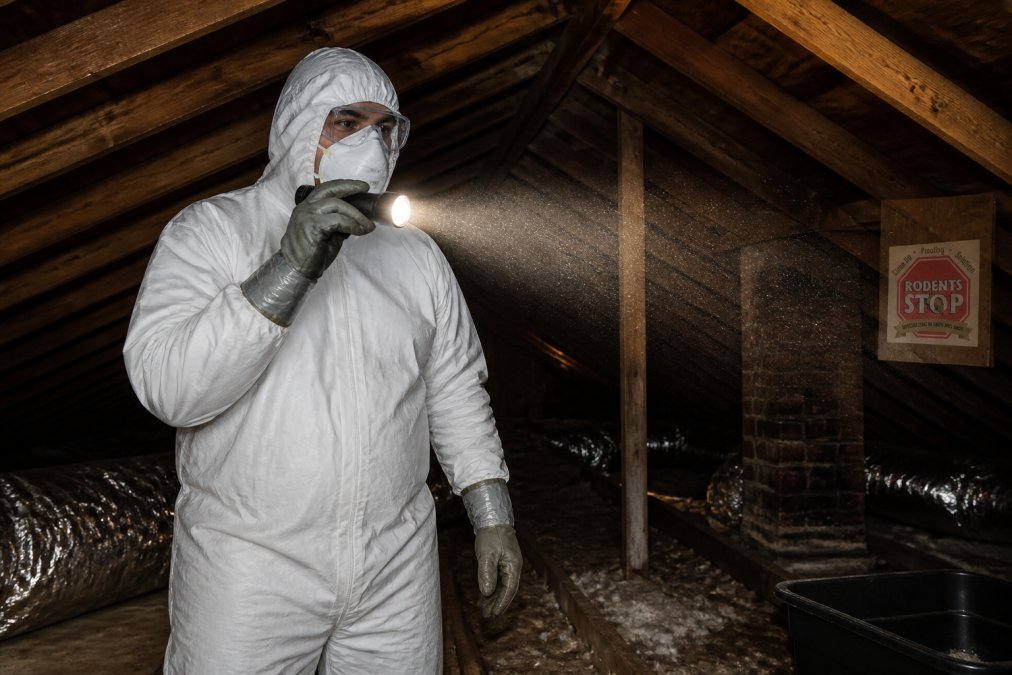
Rodent droppings cleanup safety starts with assuming every surface is contaminated. Hantavirus, salmonella, and other pathogens travel on dried fecal matter and urine dust, so your respirator and goggles go on before you open the attic hatch.
Personal Protective Equipment Checklist
- N95 respirator or P100 half-mask, fitted and sealed
- Disposable coveralls with hood and elastic cuffs
- Nitrile gloves taped at the wrist
- Sealed safety goggles, not open-side glasses
- Rubber boots or disposable shoe covers
- Heavy work gloves for debris handling
Ventilation and Site Isolation
Seal the attic hatch with plastic sheeting and tape so dust cannot drift into living areas. If the attic has a gable vent or ridge vent, keep it open for cross-ventilation while you work, but never point a box fan into the attic from below. That pushes airborne particles into the house instead of out of it. The CDC guidance on rodent control and cleanup recommends opening windows and doors in the work area and keeping people and pets out until cleanup is finished.
Step 2: Remove Contaminated Insulation and Nesting Material
Attic insulation removal after infestation is unavoidable in most severe cases. Saturated batts and loose-fill insulation hold urine, fecal matter, and nesting material deep in the fibers, where no surface spray reaches.
When Insulation Can Be Saved vs. Replaced
| Condition | Action | Why |
|---|---|---|
| Light droppings on top of batts, no staining | HEPA vacuum and disinfect surface | Contamination is surface-level |
| Visible urine stains or matted nesting material | Remove and replace | Fibers hold pathogens and odor |
| Heavy droppings, tunnels, or strong ammonia smell | Remove and replace | Contamination is throughout the material |
| Insulation is wet or compressed | Remove and replace | Moisture feeds mold and destroys R-value |
Step 3: HEPA Vacuuming and Dry Debris Removal
A HEPA-filter vacuum is the only vacuum safe for this work. Standard vacuums exhaust fine particles back into the room, spreading contamination instead of removing it.
Step 4: Choose the Best Disinfectant for Rodent Urine and Droppings
The best disinfectant for rodent urine balances pathogen kill with surface safety. A 1:10 bleach solution works on hard, non-porous surfaces like joists and sheathing, but corrodes metal fasteners and damages some insulation facings.
Fogging vs. Manual Spraying
Fogging reaches crevices, wall cavities, and gaps between joists where a sprayer cannot; manual spraying lets you scrub stained areas directly. Most thorough jobs use both, manual application on visible contamination, then fogging to treat the whole attic volume. Skip fogging and untreated pockets keep producing odor.
Never mix bleach with ammonia-based cleaners. The combination releases toxic chloramine gas. If you’re unsure what a previous cleaner contained, rinse the surface with water and let it dry before applying bleach.
Step 5: How to Sanitize Attic Surfaces and Seal Entry Points
To sanitize attic surfaces, treat every surface the rodents touched: joists, rafters, sheathing, ductwork, and wiring runs. Wood, drywall, metal ducting, and fiberglass each react differently to moisture and chemicals, so the wrong method either damages the material or leaves contamination behind.
Material-Specific Cleaning Instructions
Wood joists, rafters, and sheathing. Bare framing is porous and often stained. Spray with a 1:10 bleach solution or quaternary ammonium disinfectant, keep it wet for the stated contact time, then scrub along the grain and wipe with disposable rags. For dark urine staining bleach won’t lift, switch to an enzymatic cleaner and let it dwell longer. Do not soak the wood, repeated saturation promotes rot and warping.
Sealing Entry Points
Sealing entry points stops the cycle. Rodents fit through pencil-width gaps, so walk the exterior roofline and check:
- Gaps where the roofline meets the wall
- Vents, soffits, and gable openings
- Pipe and cable penetrations
- Chimney flashing and fascia boards
- Roof-to-wall junctions and dormer edges
Photograph every entry point before you seal it and again after. If rodents return, the photos show you exactly which seal failed, which saves hours of re-inspection.
Step 6: Waste Disposal and Long-Term Monitoring After Sanitization
Disposing of Contaminated Material
Waste disposal rules vary by county and differ from ordinary household trash rules. In most areas, bagged rodent-contaminated insulation, nesting material, and debris can go out with regular trash, but confirm with your local waste authority first, some jurisdictions require double-bagging, and some transfer stations refuse biohazard-flagged material.
A few rules apply almost everywhere:
- Double-bag everything. Line a contractor bag with a second bag, seal the inner bag with a zip tie, then seal the outer bag. This keeps torn bags from leaking contaminated dust during handling.
- Never burn contaminated insulation or nesting material. Burning aerosolizes pathogens and is illegal in most jurisdictions.
- Never place loose debris in an open bin. Everything goes in sealed bags before it leaves the attic.
- Keep bags out of reach of pets and children until pickup day.
- If your area requires special handling, contact a licensed biohazard or remediation waste hauler. For heavy infestations or commercial properties, this is often the simplest path.
30-Day Post-Cleanup Monitoring Checklist
Long-term monitoring after sanitization is the step most guides skip. Cleaning removes the contamination, but only monitoring proves the entry points are sealed. Set monitoring stations or snap traps the day cleanup ends and check them on this schedule:
Week 1, daily checks.
- Look for fresh droppings, urine stains, or gnaw marks near known entry points
- Check traps and monitoring stations every day
- Smell test: any return of ammonia odor means contamination was missed
Weeks 2-4, weekly checks.
- Inspect traps and stations once a week
- Re-walk the exterior roofline for new gaps or chewed sealant
- Check attic insulation for new tunneling or matting
- Confirm no new droppings along joists and near the hatch
Day 30, final verification.
- Zero catches across the full 30 days
- No fresh droppings, stains, or gnaw marks anywhere in the attic
- No odor when the attic hatch is opened
- All sealed entry points still intact
Sanitizing removes the contamination. Monitoring proves it stays gone. Treat the 30-day checklist as part of the job, not an optional follow-up.
DIY vs. Professional Attic Remediation: Cost-Benefit Analysis
DIY attic remediation makes sense for small, surface-level contamination in an attic you can safely access. Professional remediation makes sense when insulation must be removed, the infestation was heavy, or you need documentation for a landlord, insurer, or property sale.
| Factor | DIY | Professional |
|---|---|---|
| Best for | Light droppings, easy attic access | Heavy contamination, insulation removal |
| Equipment | HEPA vacuum, PPE, sprayer | Commercial HEPA units, foggers, containment |
| Insulation replacement | You source and install | Handled as part of the job |
| Odor and pheromone treatment | Limited to surface products | Full-volume treatment |
| Entry point sealing | Possible with research | Inspected and documented |
| Time commitment | Several weekends | Typically a scheduled visit |
Frequently Asked Questions
Can rat droppings in the attic make you sick?
Yes. Rodent droppings and urine can carry hantavirus, salmonella, and other pathogens. Disturbing dry droppings releases airborne particles that cause respiratory illness if inhaled. The CDC recommends wearing an N95 mask, gloves, goggles, and protective clothing before any cleanup. Never sweep or vacuum dry droppings with a standard shop vac, as this spreads contaminated dust. Wet the area with a disinfectant first, then remove waste with a HEPA-filter vacuum.
How do I know if my attic insulation needs to be replaced after an infestation?
Replace insulation if you see droppings, urine stains, nesting material, or a strong ammonia odor throughout the batting. Rodent urine soaks into fiberglass and cellulose, and no surface cleaning removes it completely. Insulation that is only lightly soiled in one corner may be spot-treated, but heavy contamination across the attic means full attic insulation removal after infestation is the safer choice. A professional inspection can confirm the extent of saturation.
What is the best disinfectant for rodent urine in an attic?
A 10% bleach solution (1 part bleach to 9 parts water) works for most hard surfaces, but it must sit for at least 10 minutes before wiping. For porous materials like wood framing, an enzymatic cleaner breaks down uric acid crystals that cause lingering odor. Commercial disinfectants labeled for hantavirus and salmonella are also effective. Never mix bleach with ammonia-based cleaners. Apply with a sprayer or fogger, then let the surface air-dry completely.
How long does it take to sanitize an attic after an infestation?
A typical single-family attic takes one to three days, depending on contamination level and attic size. Insulation removal and HEPA vacuuming usually take the first day. Disinfectant application, fogging, and drying add another day. Sealing entry points and replacing insulation may extend the timeline. Property managers handling multiple units should expect a phased schedule. Working with a professional rodent cleanup team can compress this timeline since they bring commercial foggers and HEPA equipment on site.