Table of Contents
- Signs of a Rodent Infestation in Your Attic
- Rodent Damage to Electrical Wiring in Attic Spaces
- Attic Insulation Replacement After Rodent Infestation
- How to Clean Rodent Droppings from Your Attic Safely
- Structural Damage and Entry Points: Gnaw Marks, Soffits, and Eaves
- Rodent Species and the Damage They Leave Behind
- Insurance, Liability, and Post-Inspection Cleanup
- Frequently Asked Questions
Last Updated: September 17, 2026
Signs of a Rodent Infestation in Your Attic
If you hear scratching above your ceiling at night, you likely have rodents in the attic. Rodent damage rarely stays hidden for long, but the earliest clues are easy to miss. This guide from Rodent cleanup experts walks through the seven warning signs, from droppings to chewed wiring, so you know exactly what you are looking at.
Noises and Nocturnal Activity
Scratching, scurrying, and light thumping between dusk and dawn point to an active infestation. Squirrels and birds move during the day, so nighttime noise is a strong rodent signal. Listen near soffits and eaves, where sound travels down into bedrooms.
Droppings, Urine Stains, and Fecal Pellets
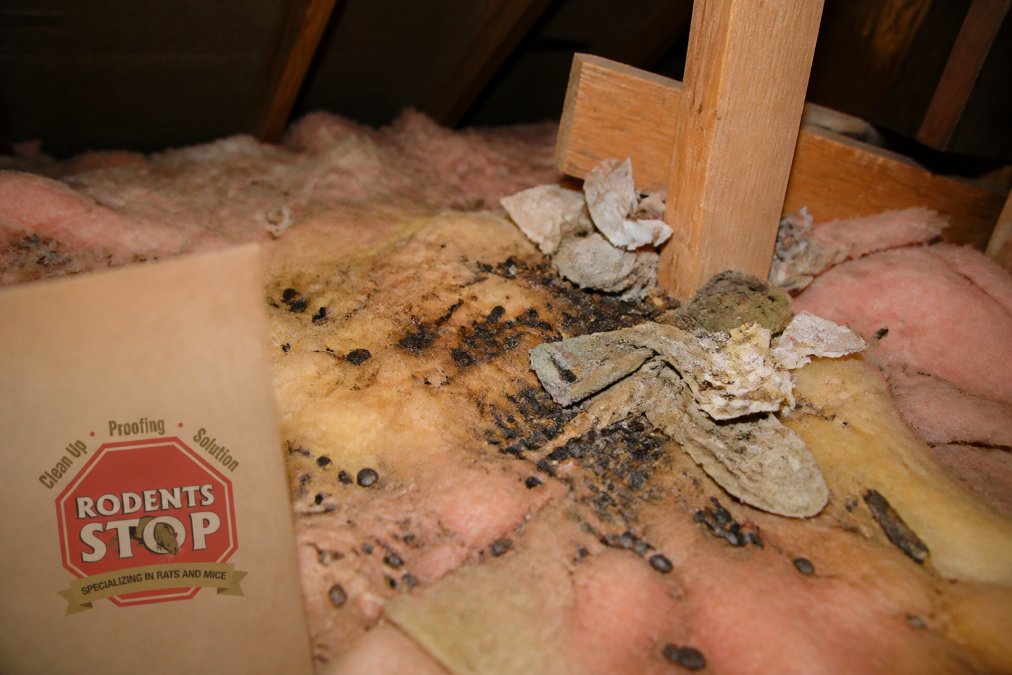
Fecal pellets are the clearest sign. Mouse droppings look like dark grains of rice; rat droppings are larger and capsule-shaped. You may also find yellow-brown urine stains on insulation, rafters, or stored boxes.
Never sweep or vacuum dry droppings without protection. Disturbing them releases dust that can carry hantavirus and other pathogens into the air you breathe.
Rodent Damage to Electrical Wiring in Attic Spaces
Chewed wiring is the most dangerous form of rodent damage in an attic. Rodent teeth grow constantly, so they gnaw on anything to wear them down, and electrical cable insulation is a favorite target.
Attic Insulation Replacement After Rodent Infestation
Contaminated insulation usually needs to come out. Rodents nest inside blown-in and batt insulation, and once urine and droppings soak in, the material holds odor and pathogens that cleaning alone will not fix.
Signs it is time for replacement:
- Visible tunnels or compressed channels through the insulation
- Strong ammonia smell that returns after airing out
- Nesting materials woven into the batting
- Staining across large sections of the attic floor
How to Clean Rodent Droppings from Your Attic Safely
Cleaning rodent droppings safely means avoiding dry sweeping, wearing proper protection, and disinfecting every surface the rodents touched. The CDC recommends sealing a contaminated area, ventilating it, and using wet methods instead of dry ones.
Here is the basic sequence:
- Open windows and set up a fan to push air outside.
- Put on gloves, an N95 respirator, and eye protection.
- Spray droppings and nesting material with a disinfectant until soaked.
- Wipe up with paper towels and seal waste in double bags.
- Disinfect the full area, then wash your hands and clothes.
DIY vs. Professional Safety Protocols
DIY cleanup works for a few droppings in an open, well-ventilated attic. It stops working when contamination is heavy, widespread, or tucked into insulation.
Photograph everything before cleanup starts. Insurers and landlords often ask for evidence of rodent activity, and once the mess is gone, that proof is gone too.
Structural Damage and Entry Points: Gnaw Marks, Soffits, and Eaves
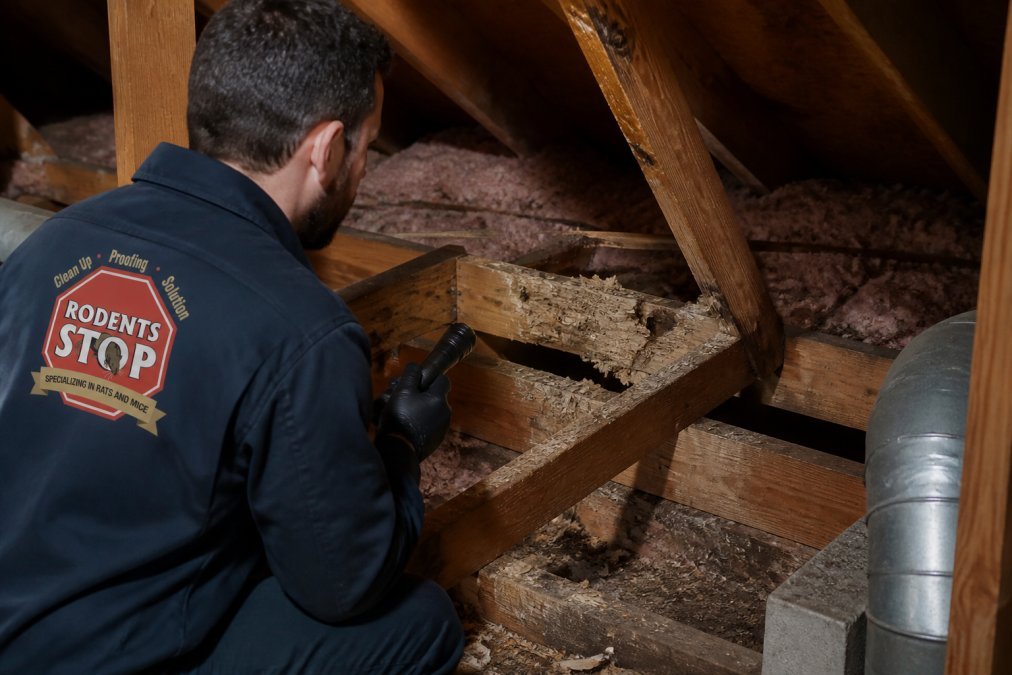
Gnaw marks on structural wood mean rodents have been in the attic long enough to settle in. Look for fresh splinters, rounded bite edges, and dark rub marks where bodies squeeze through gaps.
- Soffits and fascia: rodents chew through vents and trim boards
- Eaves: gaps where the roofline meets the wall
- Ventilation gaps: dryer vents, gable vents, and roof vents
- Utility penetrations: pipes and cables running into the attic
Rodent Species and the Damage They Leave Behind
Different rodents leave different clues, and the pattern tells you what you are dealing with. Before you assume every attic intruder is a rat, work through the evidence below. The species changes the entry point, the exclusion method, and how long the job takes.
Reading the Droppings
Droppings are the fastest identifier. Size, shape, and where they sit tell you more than a single glance at a blurry photo.
- House mice: small, pointed pellets roughly the size of a grain of rice, often scattered rather than clustered. Mice produce a high volume of tiny droppings, so you may find dozens along a single wall edge.
- Norway rats: larger, capsule-shaped droppings with blunt ends, usually deposited in loose clusters near runways and burrow entrances. Norway rats often enter low, near the foundation, garage, or crawlspace before working up into the attic.
- Roof rats: similar in size to Norway rats but with a tapered, pointed end. They are the climbers, and they typically enter at the roofline through soffits, gable vents, or gaps where the roof meets the wall.
- Squirrels: droppings resemble small, oblong pellets but are often found in loose piles near a nest site rather than along a travel path. Squirrels are active during the day, so daytime noise plus torn insulation points to them, not rats.
Gnaw Marks and Rub Marks
Rodent incisors grow continuously, so gnawing is maintenance, not just feeding. The width of the bite pattern is a rough species clue.
- Mouse gnaw marks are narrow and fine, often along the edges of stored boxes, cardboard, and food packaging.
- Rat gnaw marks are wider and deeper, and you will often see them on structural lumber, PVC pipe, and electrical cable sheathing.
- Squirrel damage tends to look less like clean gnawing and more like shredded, ripped-apart material, especially insulation batts pulled into a nest.
Matching Species to Entry Point
This is where identification turns into a repair plan.
- Mice: squeeze through gaps as small as a pencil, so exclusion means sealing a long list of tiny openings, not one big hole.
- Norway rats: often dig or enter at grade level, then travel up wall voids. Sealing the exterior foundation line and garage perimeter matters most.
- Roof rats: enter high. Soffits, fascia, roof vents, and utility penetrations at the roofline are the priority.
- Squirrels: come in through the roofline, often at a fascia gap or a damaged vent screen, and they will tear a small opening into a larger one over time.
Do not buy traps or sealant until you know the species. A roof rat entering at the soffit and a Norway rat entering at the foundation require different exclusion work, and sealing the wrong area just pushes the problem to another gap.
Insurance, Liability, and Post-Inspection Cleanup
Most homeowners assume their policy covers whatever happens in the attic. Rodent damage is one of the most misunderstood areas of a standard homeowner policy, and the distinction between the pest and the damage it causes decides whether you get a check.
What Homeowners Policies Typically Cover
The common industry pattern is that insurers treat rodents as a maintenance issue, not a sudden accident. That means the pest removal itself, trapping, exclusion work, and routine cleanup, is usually excluded.
- A rat chews through a supply pipe, water runs into the ceiling below, and the resulting water damage may fall under the policy’s water damage provisions.
- A rodent chews wiring and the resulting electrical fire damages framing. Fire damage is typically covered even though the rodent that started it is not.
- Insulation ruined by urine and droppings is usually treated as pest-related and excluded, since the contamination built up over time rather than happening in a single event.
Landlord and Tenant Liability
In rental housing, the responsibility line depends on the lease and on local habitability rules. A common pattern is that the landlord handles structural exclusion and pest control as part of maintaining a habitable unit, while the tenant is responsible for reporting the problem promptly and not making it worse.
Post-Inspection Cleanup Checklist
Once you have identified the damage, the next 48 hours matter. This is the sequence that keeps contamination from spreading and preserves your evidence.
- Photograph all droppings, gnaw marks, rub marks, and stained insulation before anything is moved
- Note the date, time, and exact location of each finding
- Do not sweep or vacuum dry droppings; use wet methods and disinfectant only
- Wear gloves, an N95 respirator, and eye protection during any inspection or cleanup
- Bag and seal all contaminated nesting material and insulation in double bags
- Save receipts for traps, repairs, electrician visits, and professional work
- Get written quotes before authorizing insulation removal or exclusion work
- Confirm the provider handles insulation removal, disposal, and sanitizing, not just trapping
- Keep a copy of your policy language on pest exclusions with your claim file
Photograph everything before cleanup starts. Insurers and landlords often ask for evidence of rodent activity, and once the mess is gone, that proof is gone too.
CDC guidance on cleaning up after rodents
Frequently Asked Questions
How can you tell if you have rodents in your attic?
Look for droppings, urine stains, and gnaw marks on wood or wires. You may hear scurrying or scratching at night since rodents are nocturnal. Check insulation for nesting materials and tunnels. Strong ammonia-like odors also signal an active infestation. If you find any of these signs, a professional inspection can confirm the extent of the rodent damage and recommend next steps.
What does rodent damage to electrical wiring in an attic look like?
Chewed wiring often shows exposed copper, frayed insulation, and teeth marks. Rodents gnaw on wires to wear down their teeth, which can lead to electrical fire hazards. Look for small piles of plastic insulation shavings near wires. If you see any damage, do not touch the wires. Contact a licensed electrician and a rodent cleanup professional to assess the risk.
How do you clean rodent droppings from an attic safely?
Never sweep or vacuum dry droppings, as this can release pathogens like hantavirus into the air. First, ventilate the area and wear gloves, an N95 mask, and eye protection. Spray droppings with a disinfectant solution, then wipe them up with paper towels and seal them in a plastic bag. For widespread contamination, professional sanitization is safer and more thorough.
When should attic insulation be replaced after a rodent infestation?
Replace insulation if it is heavily contaminated with droppings, urine, or nesting materials, or if it has lost its shape and effectiveness. Blown-in and batt insulation can harbor pathogens and odors even after surface cleaning. A professional inspection can determine whether removal and replacement are necessary. In many cases, full replacement is the only way to eliminate health risks and odors.
Rodent damage in an attic gets worse with every week you wait. Wiring degrades, insulation stays contaminated, and the odor settles deeper into the structure. If you have found droppings, gnaw marks, or chewed wiring, professional cleanup is the fastest path back to a safe home. Get started with Rodent cleanup experts and restore your attic to a clean, sanitary condition.