Last Updated: November 4, 2026
Quick Summary
To remove rodent-contaminated insulation safely, wear a fit-tested N95 or better respirator, goggles, gloves and coveralls, and ventilate the attic with an outward-pushing fan. Mist droppings and nests with bleach solution before handling so particles stay down, then bag and seal everything. Never use a regular vacuum; use a HEPA-rated one only.
- Wear a fit-tested N95 or better respirator, since a paper dust mask is not enough.
- Never use a regular shop or household vacuum on rodent waste; use HEPA-rated only.
- Mist nests with one part bleach to ten parts water and let them soak about five minutes.
- Double-bag all removed material, and seal entry points before reinsulating.
Table of Contents
- Why Rodent-Contaminated Insulation Is a Health Hazard
- Gear Up: Protective Equipment and Ventilation Before You Start
- How to Safely Clean Rat Nests in Insulation
- How to Clean Rat Urine and Feces From Insulation and Framing
- How to Sanitize the Attic After Rats
- Signs Insulation Needs Replacement After Rodents
- Bagging, Disposing, and Sealing Entry Points Before Reinsulating
- Booking Professional Cleanup for Your Southern California Property
- Frequently Asked Questions
If insulation in your attic has been soaked with rat urine, packed with droppings or chewed into nests, the job is more than a quick vacuum. Rodent-contaminated insulation can carry bacteria, viruses and allergens, and disturbing it can push those particles into the air you breathe. This guide walks you through the safe steps, what to do yourself and when to call in help.
Why Rodent-Contaminated Insulation Is a Health Hazard
Rodent droppings, urine and nesting material can carry pathogens. Hantavirus is the one most homeowners worry about, and it spreads when dried droppings or urine are stirred up and the particles are breathed in.
The risk rises in attics because they are closed, hot and poorly ventilated. Insulation traps waste in its fibers, so sweeping or pulling it out without protection can release a cloud of particles. Treat every contaminated attic as a biohazard until you know otherwise.
Stop and call a professional if you find dead rodents in large numbers, nests spread across the whole attic, or anyone in the home has breathing problems.
Gear Up: Protective Equipment and Ventilation Before You Start
Protect yourself before you open the hatch. Most of the risk comes from the first few minutes of disturbing the material.
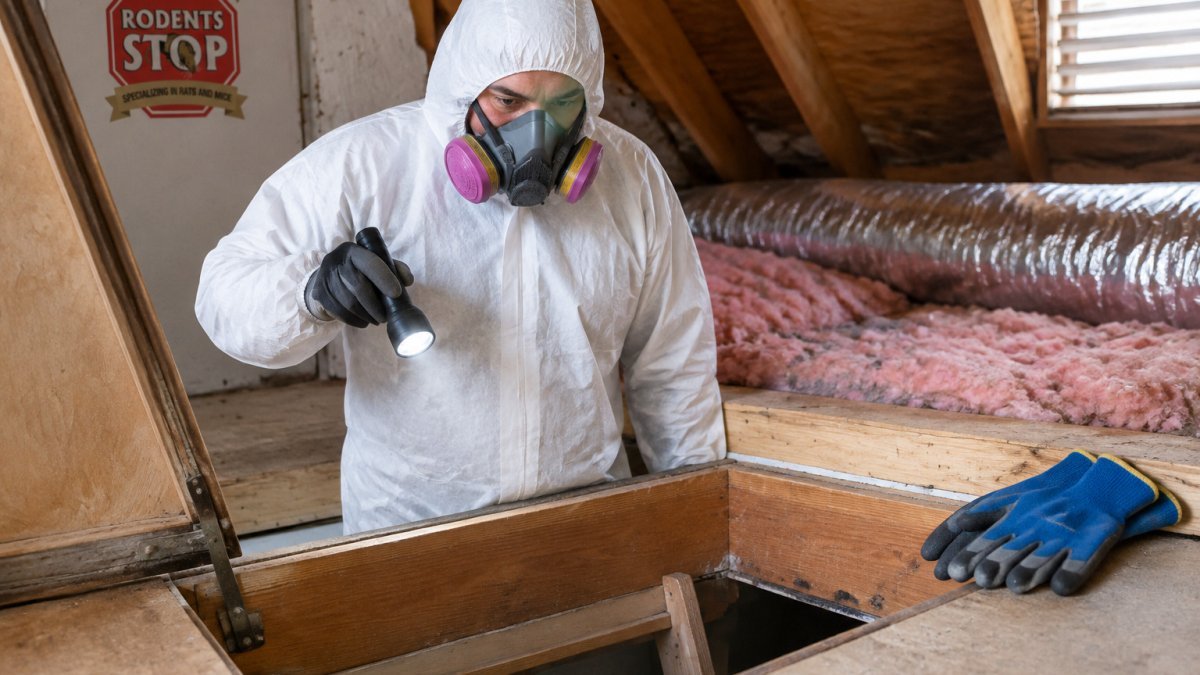
- Respirator: Use a fit-tested N95 or better respirator. A paper dust mask is not enough.
- Eye protection: Goggles that seal around the face.
- Gloves: Heavy disposable or rubber gloves, with a second pair ready.
- Coveralls: Disposable suits with a hood, taped at the wrists and ankles.
- Ventilation: Open the attic hatch and any vents, and run a fan that pushes air outward. Do not run a fan that pulls dust toward you.
Watch out: Never use a regular shop vacuum or household vacuum on rodent waste. The exhaust blows fine particles back into the air. Use a HEPA-rated vacuum only.
How to Safely Clean Rat Nests in Insulation
Nests are the most contaminated part of the attic, so handle them carefully.
- Mist the nest with a bleach solution (one part bleach to ten parts water) and let it soak for about five minutes.
- Use a scoop or stiff paper to lift the nest into a heavy plastic bag. Do not crush it.
- Seal the bag, then place it inside a second bag and seal that too.
- Wipe the spot with disinfectant and paper towels, working from the outside in.
Work in small sections. Taking out a whole attic in one pass stirs up far more particles than working one area at a time. If nesting is widespread, a rodent infestation cleanup crew can handle the nests safely in one visit rather than leaving you to work through them section by section.
How to Clean Rat Urine and Feces From Insulation and Framing
Droppings and urine soak into insulation and stain the wood framing. Pulling dry droppings apart is the fastest way to release particles, so wet everything first.
- Spray disinfectant until the surface is damp, not dripping.
- Wait about ten minutes so the disinfectant can work.
- Remove droppings with a damp paper towel or scoop.
- Scrub the framing with a disinfectant-soaked brush, then wipe it dry.
How to Sanitize the Attic After Rats
Once the waste is out, sanitize the whole space. Bleach or an EPA-registered disinfectant works well on hard surfaces, while damp wiping catches what remains.
Pay attention to these areas:
- Rafters, joists and the underside of the roof deck
- Ductwork and wiring runs
- Vent openings and the hatch edges
- Storage boxes and anything left in the attic
Let each surface air out fully before you move on. Good ventilation shortens the time it takes for smells to fade.
Signs Insulation Needs Replacement After Rodents
Not all insulation can be saved, and the decision is not just about how bad the mess looks. It comes down to the material, how deeply the waste has soaked in, and whether the insulation can be cleaned without destroying its R-value. Cleaning works for light, surface-level contamination. Replacement is usually the better call when:
- The insulation is matted, compressed or clumped with urine
- Nests run throughout the material instead of sitting in one spot
- A persistent odor returns after cleaning
- The insulation is loose-fill and deeply soaked, since it is hard to clean completely
- Wiring or vapor barriers have been damaged
Match the method to the insulation type. This is where most generic guides stop short, and it is the step that decides whether you waste a weekend cleaning material you will have to pull out anyway.
- Fiberglass batts: The most salvageable type. Batts can often be lifted out one at a time, inspected on both faces, and bagged if contaminated. Surface contamination on the facing can sometimes be damp-wiped and disinfected, but any batt that is soaked through, compressed, or has nesting material woven into the fibers should be discarded. Once a batt loses its loft, it will not recover its insulating value.
- Blown-in fiberglass: Harder to clean because the loose fibers trap waste throughout the pile rather than on the surface. Shallow contamination at the very top can sometimes be skimmed off with a HEPA vacuum and the remainder left in place, but any pile with droppings mixed through it usually has to come out completely.
- Blown-in cellulose: The least forgiving type. Cellulose is treated with fire retardants and, once wet with urine, clumps, compacts and loses both R-value and fire resistance. It also holds odor longer than fiberglass. Cellulose saturated with rodent urine is generally a candidate for full removal rather than cleaning.
- Spray foam: Closed-cell foam is non-porous and can usually be disinfected and left in place once the surface waste is removed. Open-cell foam is softer and can absorb urine, so inspect it closely and expect to remove and reapply affected sections.
Watch out: Do not try to “top off” contaminated insulation by blowing new material over it.
A simple test before you decide: pull back a small section in the worst-affected area and look at the full depth of the material, not just the top inch.
Whether insulation can be cleaned or must be replaced depends on the material, as summarised below.
| Insulation type | Can it be saved? | Key consideration |
|---|---|---|
| Fiberglass batts | Often, if surface-only | Discard if soaked through or nested |
| Blown-in fiberglass | Sometimes, if shallow | Waste trapped throughout the pile |
| Blown-in cellulose | Usually no | Clumps when wet and holds odor longer |
| Closed-cell spray foam | Usually, once disinfected | Non-porous and can stay in place |
| Open-cell spray foam | Inspect closely | Absorbs urine, so affected sections may need reapplying |
Bagging, Disposing, and Sealing Entry Points Before Reinsulating
This is the step most guides rush, and it is the one that decides whether the infestation comes back. Bagging, disposal and exclusion are three separate jobs, and each has its own rules.
Bagging contaminated material
Bag every piece of removed insulation, nest and cleaning material. Double-bag it and seal it tightly. Use heavy contractor bags rather than kitchen bags, since torn bags are the most common cause of a spill on the way out. Do not compress bags to save space; crushing the contents pushes dust out through the seams. Carry bags out through the attic hatch in small loads rather than dragging them across the ceiling.
Disposing of biohazardous waste legally
Disposal rules for rodent-contaminated material vary significantly by jurisdiction, and this is the part competitors skip. In most areas, insulation and nesting material that has been in contact with rodents is treated as general household waste once it is double-bagged, but some waste haulers and transfer stations classify it as biohazardous and require separate handling. Before you load the truck:
- Call your local waste hauler or the transfer station that serves your address and ask how they want rodent-contaminated insulation bagged and delivered.
- Ask whether the material can go in the regular curbside bin or must be dropped off in person.
- Keep the bags sealed until they are at the disposal point, and never leave them in a garage or shed where rodents can get back into them.
- If the job is large enough to fill a dumpster, confirm with the rental company what they will and will not accept before you start loading.
Confirming disposal requirements before the job can prevent a load from being rejected at the disposal site.
Sealing entry points before you reinsulate
Do not reinsulate until you have closed the way rodents got in. This is the exclusion step, and it is the difference between a cleanup and a fix. Look for gaps around pipes, vents, eaves and the roof edge.
Work through the attic methodically rather than scanning by eye:
- Plumbing penetrations: The most commonly missed entry point. Check every pipe that passes through the ceiling and floor plates.
- Vent and fan openings: Bathroom fans, dryer vents and gable vents often have gaps around the housing.
- Eaves and roof edges: Look for gaps where the roofline meets the wall, and check soffit panels for chew marks.
- Chimney and flue collars: The gap where the flue passes through the roof deck is a classic entry point.
- Utility and cable runs: Where wiring and conduit enter the attic, seal around them.
Watch out: Sealing the attic without confirming the rodents are gone can trap animals inside, where they will die and create a worse odor problem than the one you started with.
Small gaps near plumbing are a common entry point, so check those penetrations carefully before reinsulating.
Booking Professional Cleanup for Your Southern California Property
Some jobs are better left to a crew.
Rodent Cleanup Experts inspects the affected areas first, then builds a plan around what the property needs. Services can include removal of droppings and nesting material, contaminated insulation removal, HEPA vacuuming, sanitizing, odor treatment and replacement insulation.
Homeowners who want to understand the process before booking can review how Rodent Cleanup Experts approaches attic cleanup. Our guide on how to identify rodent entry points in your home shows where to look.
When insulation needs full replacement, a professional insulation removal and replacement service can handle the job from start to finish. For commercial properties, our commercial rodent cleanup services in California cover the added requirements for larger spaces. And for a complete picture of restoring an attic after an infestation, see our attic restoration guide.
Rodent Cleanup Experts serves homeowners, landlords and property managers in Los Angeles, Ventura, San Bernardino, Riverside and Orange Counties.
Frequently Asked Questions
How long do rat droppings remain toxic?
Rat droppings can remain a source of pathogens for weeks or longer, especially in dark, dry, or undisturbed spaces such as attic insulation. The exact time depends on moisture, temperature, and airflow, so there is no safe expiration date you can rely on. Treat all droppings and urine-stained material as contaminated until it has been removed and the area disinfected. Never assume old droppings are harmless because they look dry.
How can I safely remove rodent-infested insulation?
Wear a properly fitted N95 respirator, disposable coveralls, and gloves, and ventilate the space before you begin. Mist contaminated material with a disinfectant solution to reduce airborne particles, then remove it into heavy-duty bags without sweeping or dry vacuuming. Seal the bags and dispose of them according to local rules. Afterward, disinfect the exposed framing and sealed surfaces before reinstalling any new insulation.
Should insulation contaminated by mice or rats be replaced?
In most cases, yes. Fiberglass and cellulose lose their insulating value once they are soaked with urine, matted with nesting material, or compressed by rodent activity, and they are difficult to disinfect thoroughly. Wet, smelly, or heavily stained insulation should be removed and replaced. Lightly affected areas that can be fully cleaned may be treated instead, but a professional inspection can help you decide.
What protective equipment should I wear when removing contaminated insulation?
Use a fit-tested N95 or higher-rated respirator, disposable coveralls, nitrile or rubber gloves, and eye protection. Cover your hair and skin, and tape the cuffs of your coveralls to your gloves. Remove the gear carefully when you finish, bag it with the waste, and wash your hands thoroughly. Do not reuse disposable items.

Do I need all the attic insulation removed after mice or rats?
Ask the assessor to show where droppings or nests were found and mark the affected areas on the estimate. A single damaged section and contamination spread across several attic bays call for different scopes of work. For a Los Angeles County home, a useful quote states how much insulation will be removed, what replacement is included, and which entry points need repair. Tell the crew about any persistent attic odor before they prepare the quote.