Table of Contents
- How to Recognize Rodent Infestation in Attic Insulation
- Signs of Mice in the Attic: Small Clues, Big Problems
- How to Tell Rats From Mice in the Attic
- Insulation Tunnels, Chewed Wires, and Gnaw Marks
- A Safe Step-by-Step Attic Inspection Checklist
- When to Replace Attic Insulation After Mice
- Professional Rodent Attic Cleanup: What the Service Covers
- Conclusion
- Frequently Asked Questions
Last Updated: November 18, 2026
How to Recognize Rodent Infestation in Attic Insulation
Rodent infestation in attic insulation leaves a trail you can read long before you see an animal. At Rodent cleanup experts, we inspect attics across Southern California, and the pattern is consistent: the insulation tells the story first. Mice and rats nest inside it, tunnel through it, and soil it with droppings and urine. The insulation holds that contamination in place, which is why the smell lingers for months after the animal is gone.
Noises That Signal Nocturnal Activity
Scratching, squeaking, and scurrying sounds between dusk and dawn point to nocturnal rodents moving through the attic. The timing matters more than the sound itself.
- Scratching in short bursts usually means gnawing or digging into insulation
- Squeaking signals young mice or a crowded nest
- Scurrying overhead follows the same travel trails night after night
Hear it during the day? That often points to rats, which are bolder than mice.
Droppings, Urine Stains, and Musky Odor
Droppings are the clearest sign of rodents in attic insulation. Mouse droppings look like small dark grains of rice; rat droppings are larger and thicker. Both collect along travel trails, near nests, and on top of the insulation.
Urine soaks into insulation and dries into dark stains. The musky odor that follows is one of the hardest problems to fix, because the material keeps releasing it.
Never dry-sweep or vacuum droppings with a shop vac. Disturbing them sends contaminated dust and allergens into the air you breathe. Dampen the area first and wear proper protection.
Found Rat Droppings in Your Attic Insulation?
If you’ve spotted rat droppings in attic insulation, the first question is how far they extend. During an attic assessment, Rodents Stop checks the surrounding insulation for nesting material and urine staining, then explains which areas need cleanup and whether any insulation needs removal. We also look for gaps where rats can get back in. Homeowners in Los Angeles, Ventura, Orange, Riverside, and San Bernardino counties can call 833-END-RATS to schedule an attic assessment.
Signs of Mice in the Attic: Small Clues, Big Problems
Small clues add up fast with mice. Look for smudges and oily rub marks along beams where their bodies brush the wood. Those marks are visible signs of mice in the attic that most people walk right past.
Check the insulation surface too. Mice push it aside to build shallow burrows, leaving a dimpled, disturbed texture. Nesting material is another giveaway:
- Shredded insulation fibers
- Fibers pulled from stored blankets or clothing
- Paper scraps and plant matter gathered in a corner
A single mouse can produce dozens of droppings a day, so small evidence rarely stays small for long.
How to Tell Rats From Mice in the Attic
Size separates the two. Rats are larger, with thicker bodies and blunt noses; mice are small and slender. The evidence differs in scale as well.
| Sign | Mice | Rats |
|---|---|---|
| Droppings | Grain-of-rice sized, pointed ends | Larger, capsule shaped, blunt ends |
| Rub marks | Faint smudges | Heavy, greasy trails along beams |
| Noises | Light scratching and squeaking | Louder scurrying and gnawing |
| Nest location | Inside insulation, near walls | Corners, voids, and insulation tunnels |
| Damage | Small gnaw marks | Larger chewed wires and wood damage |
Rats also leave wider travel trails through blown-in insulation. If you find tunnels the width of two fingers or more, lean toward rats.
Insulation Tunnels, Chewed Wires, and Gnaw Marks
Insulation tunnels are the most underrated sign of an active infestation. Rodents compress and push insulation aside to create runways, and those channels stay open long after the animal passes through. Batt insulation shows crushed channels; blown-in insulation shows clear paths carved through the pile.
Gnaw marks on wood, wiring, and stored items tell you how long they have been there. Chewed wires are the serious one. U.S.
Follow the tunnels. They usually run from an entry point along a beam to a nest. Mapping them is the fastest way to find where rodents are getting in.
A Safe Step-by-Step Attic Inspection Checklist
A safe inspection follows a fixed order and a strict set of precautions. Rodent droppings and urine can carry hantavirus and other pathogens, and dried droppings release contaminated dust the moment they are disturbed.
Before you open the hatch:
- Fit an N95 respirator (or P100 if you have one) and seal it against your face before entering.
- Wear disposable gloves, long sleeves, long pants, and closed-toe shoes. Tie back hair.
- Bring a bright LED flashlight and a headlamp so both hands stay free.
- Set up a work light at the hatch so you can see the first few feet of insulation without stepping in.
The inspection, in order:
- Stand at the hatch and look before you step. Scan the insulation surface for tunnels, trails, and dark staining. Do not walk into the attic until you have mapped a safe path along the joists.
- Check the perimeter first. Look along the eaves, wall plates, and top plates for rub marks, droppings, and grease trails. Rodents hug edges, so the perimeter is where evidence concentrates.
- Inspect the insulation surface. Look for dimpled burrows, pushed-aside material, and clear runways. Lift only a small section near the hatch, never dig through the pile, which aerosolizes dust.
- Trace the wiring and beams. Follow wire runs and the tops of joists for gnaw marks and chewed insulation. Chewed wire insulation is the highest-risk finding in the attic.
- Check stored items and boxes. Cardboard, paper, and fabric stored in the attic are common nesting material. Look for shredded edges and droppings on top of boxes.
- Map entry points. Note gaps at vents, soffits, roof lines, pipe penetrations, and gable vents on a sketch. Rodents can enter through gaps as small as a quarter inch for mice and a half inch for rats.
- Photograph everything. Date the photos so you can compare evidence on a follow-up visit.
Safety rules that are not optional:
- Never dry-sweep, dry-vacuum, or kick up droppings. Dampen the area first with a spray bottle, then wipe with disposable towels.
- Do not use a shop vac on droppings unless it is fitted with a HEPA filter and you are wearing full protection.
- Keep the attic ventilated. Open the hatch and any vents before you enter, and take breaks in fresh air.
- Wash hands and face with soap and water when you leave, and change clothes before sitting on furniture.
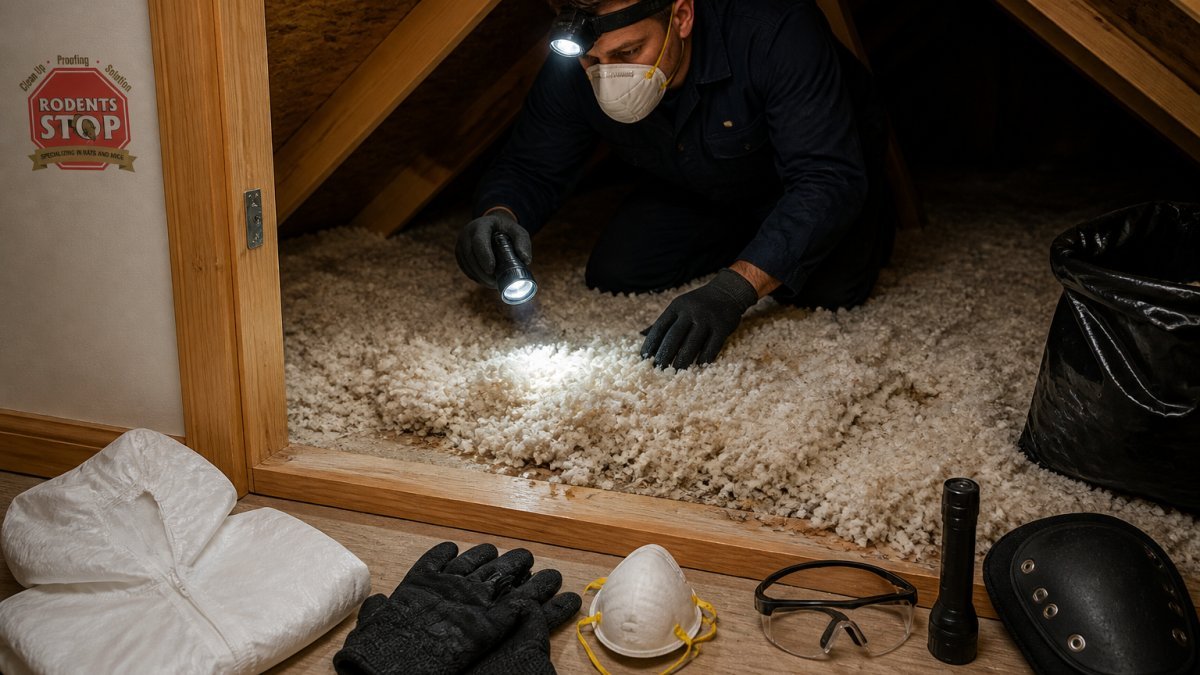
Hantavirus is transmitted by breathing dust contaminated with rodent droppings and urine. Never sweep, vacuum, or disturb droppings without a respirator and gloves, and never dry-sweep an attic. Dampen first, then remove.
Telling Active Infestation From Old Evidence
Fresh evidence looks different from old evidence, and the difference tells you whether the problem is ongoing or already gone. Use these comparisons:
| Evidence | Active infestation | Old, inactive evidence |
|---|---|---|
| Droppings | Dark, soft, moist; new ones appear within days | Gray, dry, crumbly; no new ones after a week |
| Rub marks | Greasy, dark, fresh to the touch | Dry, faded, dusty |
| Tunnels | Open, clear, with fresh droppings inside | Filled with settled dust and cobwebs |
| Odor | Strong, musky, gets worse in warm weather | Faint or fading over time |
| Insulation | Recently disturbed, pushed aside, shredded | Settled, compacted, undisturbed |
| Gnaw marks | Light-colored, sharp edges, fresh wood exposed | Darkened, rounded, weathered |
The one-week test: Mark a small area with a piece of tape or a dated photo, then check again in seven days. New droppings, fresh rub marks, or newly opened tunnels confirm an active infestation.
What active evidence changes: If the infestation is active, cleanup alone will not solve it. You need exclusion, sealing entry points, before or alongside cleanup, or rodents will recontaminate the insulation within weeks.
Warm weather makes odor stronger and droppings dry faster. Inspect in the morning, when overnight activity is freshest, and compare what you find against the table above.
When to Replace Attic Insulation After Mice
Insulation is porous, and that is the whole problem. Urine soaks into the fibers and dries inside them; droppings crumble into the pile; nesting material works its way down. Surface cleaning reaches the top layer and nothing below it.
Replace the insulation when any of these are true:
- Widespread contamination. Droppings, staining, or nesting material across a large area of the attic, not just one corner.
- Urine saturation. Dark staining that has soaked through the insulation layer, or a strong odor that returns within days of cleaning.
- Structural collapse. Insulation that has lost its loft and shape from tunnels and burrows, which also reduces its R-value.
- Recurring odor. A musky smell that comes back after surface treatment, especially in warm weather.
Spot removal versus full replacement:
| Situation | Recommended approach |
|---|---|
| One small nest, contained droppings, no odor | Spot removal of the affected section, then sanitize the area |
| Contamination in one corner but odor throughout | Remove the affected section, HEPA-vacuum and sanitize the surrounding area, monitor for a week |
| Droppings and staining across the attic, strong odor | Full removal and replacement |
| Tunnels throughout the pile, compressed insulation | Full removal and replacement, plus air sealing before new insulation goes in |
What replacement actually involves:
- Remove the contaminated insulation and bag it for disposal.
- HEPA-vacuum the attic surfaces to capture dust and allergens.
- Sanitize the framing, joists, and decking where droppings and urine contacted the wood.
- Treat odor at the source, the wood, not just the air, with an enzyme or odor-neutralizing treatment.
- Seal entry points before new insulation goes in, or rodents will return.
- Install new insulation to the correct R-value for the climate zone.
Why cleaning alone usually fails: Insulation holds contamination in place and keeps releasing odor and allergens. A common pattern is a homeowner who cleans the surface, notices the smell fade for a week, then watches it return as warm weather pulls the odor back out of the material.
The decision rule is simple: if the contamination is contained to one small area, spot removal works. If it is widespread, saturated, or the odor keeps returning, replace the insulation, and seal the entry points first so the problem does not come back.
Professional Rodent Attic Cleanup: What the Service Covers
Professional rodent attic cleanup goes beyond removing the animal. It removes what the animal left behind. A full service typically includes droppings and nesting material removal, contaminated insulation removal, HEPA vacuuming, deep cleaning and sanitizing, odor and pheromone treatment, and insulation replacement.
Rodent cleanup experts handles this work for homes and rental properties across Los Angeles, Ventura, San Bernardino, Riverside, and Orange counties.
The smell will not go away while contaminated insulation stays in place. Removal and sanitation are what end it.
Conclusion
Reading the signs early saves you from a much larger cleanup later. Tunnels, droppings, and musky odor all point to the same conclusion: the insulation itself is contaminated, and cleaning the surface will not fix it. Rodent cleanup experts removes contaminated insulation, sanitizes the space, treats odor at the source, and helps seal entry points so the problem does not come back.
Frequently Asked Questions
Do I need to replace attic insulation after mice?
Not always, but contamination usually decides it. Insulation that is matted, tunneled, soaked with urine, or holding nesting material and droppings cannot be cleaned back to a sanitary condition and should be removed and replaced. Lightly touched batts in a small corner may only need the affected pieces pulled. A professional rodent attic cleanup inspection can confirm the extent, since rodent infestation often spreads farther through blown-in insulation than it appears from the hatch.
How do I know if it’s a rat or mouse in my attic?
Size and droppings give it away. Mouse droppings run about the size of a grain of rice with pointed ends, while rat droppings are closer to a small olive and blunt. Scratching and scurrying sounds are lighter and faster for mice, heavier and more deliberate for rats. Rats also leave greasy rub marks along beams and gnaw larger holes. Knowing which one you have matters because rats need bigger entry points sealed and tend to travel farther from the nest.
Can rodent droppings in attic insulation affect indoor air quality?
Yes. Droppings, urine, and nesting material dry out and shed particles that can drift through gaps around recessed lights, vents, and the attic hatch into living space. That material carries allergens and bacteria, and the musky odor is a sign it is present. Disturbing contaminated insulation with a shop vacuum or broom makes it worse by pushing particles into the air. Sealing the attic access and using HEPA filtration during removal keeps the rest of the house out of the path.
Should I inspect attic insulation myself after hearing noises?
A look from the hatch with a flashlight is reasonable. Full inspection is not, especially if you find droppings, chewed wires, or heavy contamination. Rodent urine and droppings carry health risks, and attics hold real hazards: loose fill that hides ceiling joists, hot temperatures, and damaged wiring. If you see active signs, keep the hatch closed, note what you observed, and have the space assessed before anyone crawls through it.