
Last Updated: October 29, 2026
Quick Summary
Long term rodent exclusion means sealing every gap wider than a quarter inch at the building envelope, then maintaining that barrier with twice-yearly inspections in spring and fall. Because complete elimination of urban rats and mice is often unrealistic, rodent exclusion focuses on defending the building envelope and cutting off food, water, and shelter.
- A mouse needs only about a quarter inch of gap, a rat about half an inch.
- Pack steel wool into small gaps and seal over it so it cannot be pulled out.
- Never rely on expanding foam alone as a barrier because rodents chew through it.
- Run the full exclusion checklist twice a year, in spring and fall.
- Seal entry points only after the active rodent population is under control.
Table of Contents
- Why Rodent Exclusion Beats Repeated Trapping
- Rat and Mouse Entry Points in a Home
- Your Rodent Exclusion Inspection Checklist
- How to Seal Mouse Entry Points With the Right Materials
- Rodent-Proofing Attic and Crawl Space Areas
- Cutting Off Food, Water, and Shelter Sources
- Safe Exclusion When Rodents Are Already Inside
- Building a Monitoring and Maintenance Schedule
- Frequently Asked Questions
Why Rodent Exclusion Beats Repeated Trapping
Trapping removes the rodents you have. Exclusion stops the next wave from getting in, which is why long term rodent exclusion strategies for homes matter more than any trap you can set. The National Park Service’s Rodent Exclusion Manual frames exclusion as a mechanical, multi-practice process rather than a one-time fix.
Here is the uncomfortable truth most guides skip. Complete elimination of urban rats and mice is often unrealistic, according to UC Agriculture and Natural Resources. Defending the building envelope is the achievable goal. That reframes the whole job: you are not trying to win a war, you are trying to close a door.
Below, we break down the entry points, materials, and maintenance schedule that make exclusion hold up over years, not weeks.
Rat and Mouse Entry Points in a Home
Rodent exclusion succeeds or fails at the building envelope. Mice and rats exploit the same weak spots on nearly every home, and knowing them turns a vague worry into a targeted repair list.
The usual suspects:
- Foundation and sill plate: cracks, gaps around pipes, and mortar failures
- Exterior walls: gaps at vents, utility penetrations, and siding transitions
- Roofline: gaps at fascia, soffit, and roof-to-wall junctions
- Attic and crawlspace: open vents, torn screens, and gaps at access hatches
- Garage: gaps under doors and around service entries
- Utility penetrations: pipes, wiring, and HVAC lines passing through walls
The CDC’s rodent control guidance stresses that regular interior and exterior inspection identifies rodent signs, and that control is easier before rodents establish themselves. That timing point matters. A gap you seal this month is a nest you never clean out next year.
Your Rodent Exclusion Inspection Checklist
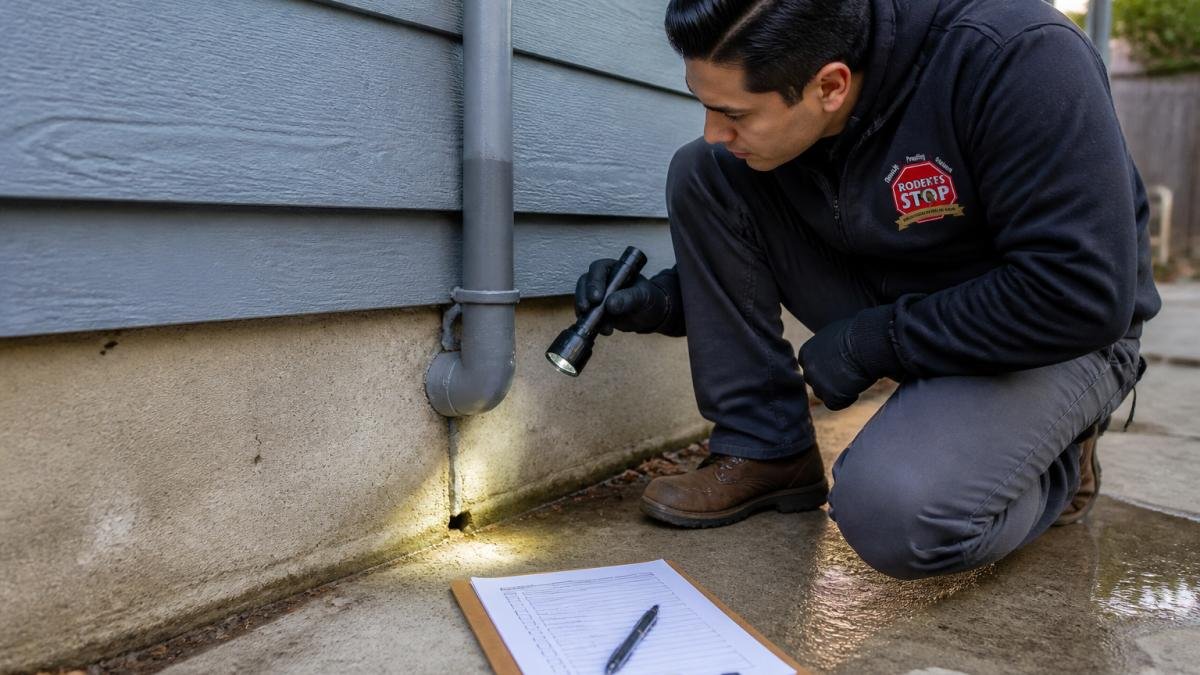
A rodent exclusion inspection checklist turns a vague walk-around into a repeatable routine. A zone-by-zone pass is more systematic than a random perimeter walk because rodents tend to exploit predictable weak spots. Work the full list twice a year, in spring and fall, and run the quick monthly exterior pass in between.
Exterior Zone Checklist
- Walk the full perimeter and note every crack, gap, and opening wider than a quarter inch, a mouse needs only about a quarter inch, a rat about half an inch
- Check all utility penetrations where pipes, wiring, and HVAC lines enter the wall
- Inspect door sweeps and thresholds for daylight and worn bristles
- Look at foundation vents, soffit vents, and dryer vents for tears, missing screens, or gaps
- Review roofline and fascia from the ground with binoculars; note gaps at roof-to-wall junctions
- Note vegetation touching the structure, branches overhanging the roof, and any standing water
Interior Zone Checklist
- Garage: gaps under the overhead door, at service entries, and where the sill meets the slab
- Attic: droppings, nests, rub marks, torn screens, and gaps where wiring and HVAC lines pass through the ceiling
- Crawlspace: rim joist, foundation vents, and the gap where the foundation meets the sill
- Kitchen and pantry: gnaw marks on packaging, droppings in drawers, and gaps behind appliances
- Basement and storage: clutter piles, cardboard, and gaps at the sill plate
Why do droppings keep appearing in the kitchen?
Fresh droppings under the sink a few days after cleanup can point to an entry route hidden behind the cabinets. During a kitchen assessment, we trace activity around plumbing and appliance connections to see where rats or mice are getting in. That helps us plan the cleanup, seal the entry points and check for fresh activity afterward.
For help with a recurring kitchen infestation in Los Angeles, Ventura, or Orange County, call 833-END-RATS to schedule an assessment.
Log What You Find
Keep a simple log with four columns: date, location, what you found, and what you did about it. Track droppings, gnaw marks, trap activity, and repair condition. A pattern of repeated activity in one zone tells you the barrier there is failing, not that the whole strategy is wrong.
Photograph each repaired opening with a date stamp. When a gap reopens after a storm or a settling season, the photo tells you whether the seal failed or a new opening appeared.
For a step-by-step walkthrough of spotting entry points, our guide on how to identify rodent entry points in your home pairs well with this list.
How to Seal Mouse Entry Points With the Right Materials
How to seal mouse entry points comes down to matching the material to the gap and installing it so a rodent cannot work it loose. Caulk alone can be gnawed through, so a barrier made of a material rodents cannot chew holds better.
Rodent exclusion materials worth knowing:
| Material | Best For | Installation Notes |
|---|---|---|
| Steel wool | Packing small gaps around pipes and wiring | Pack tight, then seal over it so it cannot be pulled out |
| Steel mesh / hardware cloth | Vents and larger openings | Cut to fit, fasten with screws or staples so nothing can push it loose |
| Metal flashing | Door edges, sill gaps, and chewed corners | Bend to fit and fasten mechanically, not with adhesive alone |
| Caulk and sealant | Cracks and seams | Back it with steel wool in gaps wider than a hairline |
| Door sweeps | Gaps under exterior doors | Check fit seasonally; replace worn bristles |
| Expanding foam | Filling large voids before covering | Never use alone as a barrier, rodents chew through it |
Installation Mechanics That Hold
For a deeper look at methods and materials, see our guide on the 5 best ways to seal rodent entry points.
Stuffing a gap with caulk or expanding foam alone invites a rodent to chew straight through it, and you will be resealing the same spot within months. Foam is a filler, not a barrier.
Match the Material to the Opening
A quarter-inch gap around a pipe calls for steel wool packed tight and sealed. A torn soffit vent calls for hardware cloth cut to size and fastened at the corners. A chewed door corner calls for metal flashing bent over the edge.
Rodent-Proofing Attic and Crawl Space Areas
Rodent-proofing attic and crawl space areas can be harder than it looks. These spaces are dark, awkward, and full of penetrations, which is exactly why rodents favor them.
Start at the roofline. Seal gaps at fascia, soffit, and roof-to-wall junctions, and screen every vent. Inside the attic, check where wiring and HVAC lines pass through the ceiling. In the crawlspace, inspect the rim joist, foundation vents, and the gap where the foundation meets the sill. For a detailed walkthrough, our guide on how to seal gaps in attic eaves covers the roofline step by step, and how to block rodent access points in a foundation handles the crawlspace side.
The Journal of Integrated Pest Management’s 2026 study on exclusion needs and costs examined exclusion needs across multifamily building types, a reminder that building form shapes where the weak points cluster.
Cutting Off Food, Water, and Shelter Sources
Sealing gaps is half the job. The other half is making the property less attractive in the first place.
Cornell’s guidance on managing mice and rats identifies sanitation and a solid management plan as central to long-term prevention. In practice, that means:
- Store food in sealed containers, including pantry staples
- Secure pet food and clean up spills promptly
- Keep garbage in lidded bins and take it out regularly
- Reduce clutter in garages, basements, and storage areas
- Trim vegetation back from the structure and remove tree branches overhanging the roof
- Fix leaks and eliminate standing water
A common mistake is cleaning once and calling it done. Rodents return to reliable food and shelter, so consistency beats intensity.
Safe Exclusion When Rodents Are Already Inside
When rodents are active inside, exclusion gets riskier. Disturbing droppings and nesting material can release allergens and bacteria into the air, so sequencing matters.
The safe order:
- Address the active population first, working with a pest control professional
- Seal entry points only after activity is under control
- Clean and sanitize contaminated areas with proper protective equipment
- Replace damaged insulation rather than trying to clean it
This is where professional help earns its keep. Our rodent exclusion and cleanup services guide explains what professional exclusion and cleanup involve, including HEPA vacuuming, sanitizing, and odor treatment. If you are weighing DIY against professional cleanup, remember that a household vacuum and bleach will not address contamination inside insulation or the pheromone trails that draw rodents back.
Building a Monitoring and Maintenance Schedule
Exclusion is not a one-time event. A maintenance schedule keeps the barrier intact as seasons, weather, and settling take their toll.
| Task | Frequency | What to Check |
|---|---|---|
| Exterior perimeter walk | Monthly | New cracks, gaps, vegetation contact |
| Door sweep and threshold check | Seasonal | Daylight under doors, worn sweeps |
| Attic and crawlspace inspection | Twice yearly | Droppings, nests, torn screens |
| Full checklist run | Spring and fall | All entry points, reseal as needed |
| Post-storm inspection | After major weather | Roof, fascia, foundation cracks |
Track what you seal and when. Resealing is normal maintenance, not failure. Neighborhood rodent pressure rises and falls, and a barrier that held last year may need attention this year.
Rodents will keep testing your home’s weak points, and the only durable answer is a sealed envelope backed by a real maintenance routine. If you are facing an active infestation, contaminated insulation, or persistent odor, Rodent cleanup experts provides professional rodent damage cleanup, sanitation, odor removal, and restoration, including contaminated insulation removal, HEPA vacuuming, deep cleaning, and pheromone treatment. Get started with Rodent cleanup experts and restore your home to a clean, sanitary condition.
Frequently Asked Questions
What keeps mice away permanently?
Permanent results come from physical exclusion, not repellents. Seal every gap and opening with steel wool, steel mesh, hardware cloth, or metal flashing, then keep food, pet food, and garbage sealed. The National Park Service describes integrated pest management as using a variety of practices for long-term results, and Cornell notes that sanitation plus a written management plan is central to lasting prevention. Pair sealing with routine inspections so new gaps get caught early.
What materials are best for sealing rodent entry points?
Use materials rodents cannot gnaw through. Steel wool packed into small gaps, steel mesh or hardware cloth over larger openings, and metal flashing at rooflines and sill plates all hold up. Finish with exterior-grade caulk or sealant around utility penetrations and cracks. Avoid spray foam alone, plastic mesh, and wood filler, since mice and rats can chew through them. The National Park Service rodent exclusion manual covers these mechanical techniques in detail.
Does sealing entry points get rid of rodents already inside?
No. Sealing traps rodents inside walls, attics, or crawl spaces, which makes odors and contamination worse. Remove the animals first with trapping, then seal. If droppings or nesting material are present, clean and sanitize before closing up cavities. The CDC recommends inspecting for rodent signs and acting before rodents become established, since control is easier at that stage. A professional assessment can confirm the space is clear before final sealing.
How often should I inspect my home for rodent entry points?
Walk the exterior and check the attic, crawlspace, and garage at least twice a year, and after any storm, roof repair, or utility work. The CDC points to regular interior and exterior inspection as the way to spot rodent signs early. In Southern California, also check when neighborhood rodent pressure rises or when temperatures push animals indoors. Keep a dated log of each inspection so you can spot recurring gaps and reseal them quickly.
When should I call a professional for rodent exclusion?
Call a professional when rodents are already inside walls or attic spaces, when droppings and contaminated insulation need removal, or when entry points sit high on the roofline or behind finished surfaces. Safe cleanup requires HEPA vacuuming, sanitizing, and odor treatment that standard household tools do not handle well.
